DESCRIPTION
Discover the mine’s full-value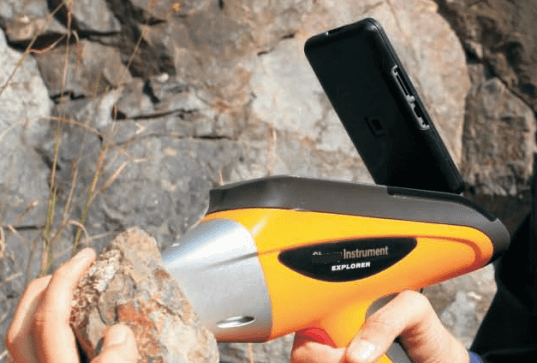
- HD camera function, observes the detected vein and point position more intuitive, manages and controls the process of mining exploitation better, detects the grade of ore at any time.
- During ore dressing, the quick and accurate analysis of raw ore, concentrate and tailings , provides the value judgment basis for the determination of ore grade, mineral trade, processing and recycling.
Environmental monitoring
- To monitor and detect the heavy metals in the soil around the mines, to evaluate mine repair environments, in order to maximize the monitoring the surrounding environment of good mines.

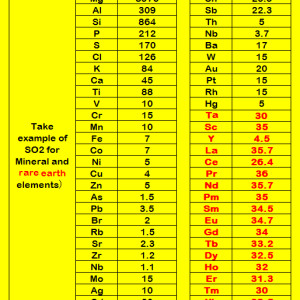
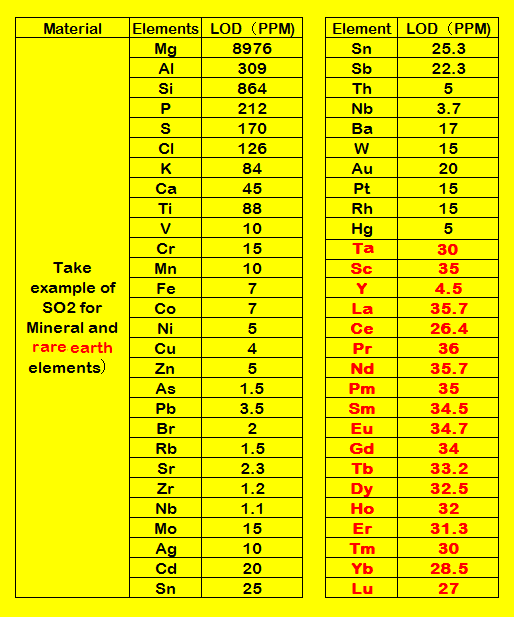
HANDHELD XRF ANALYZER DETECTION LIMITS
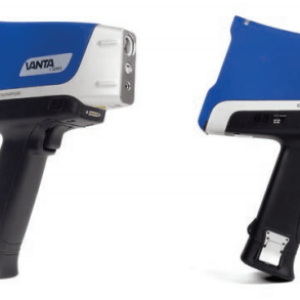
SIX ADVANTAGES OF OUR HANDHELD XRF ANALYZER
Easier Operating
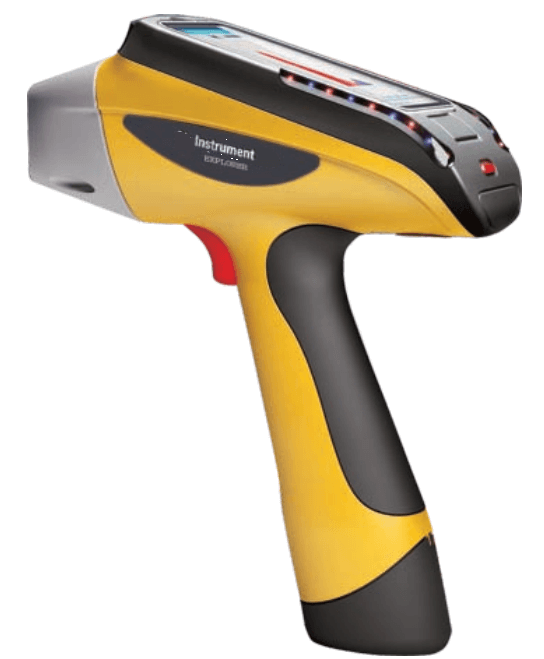
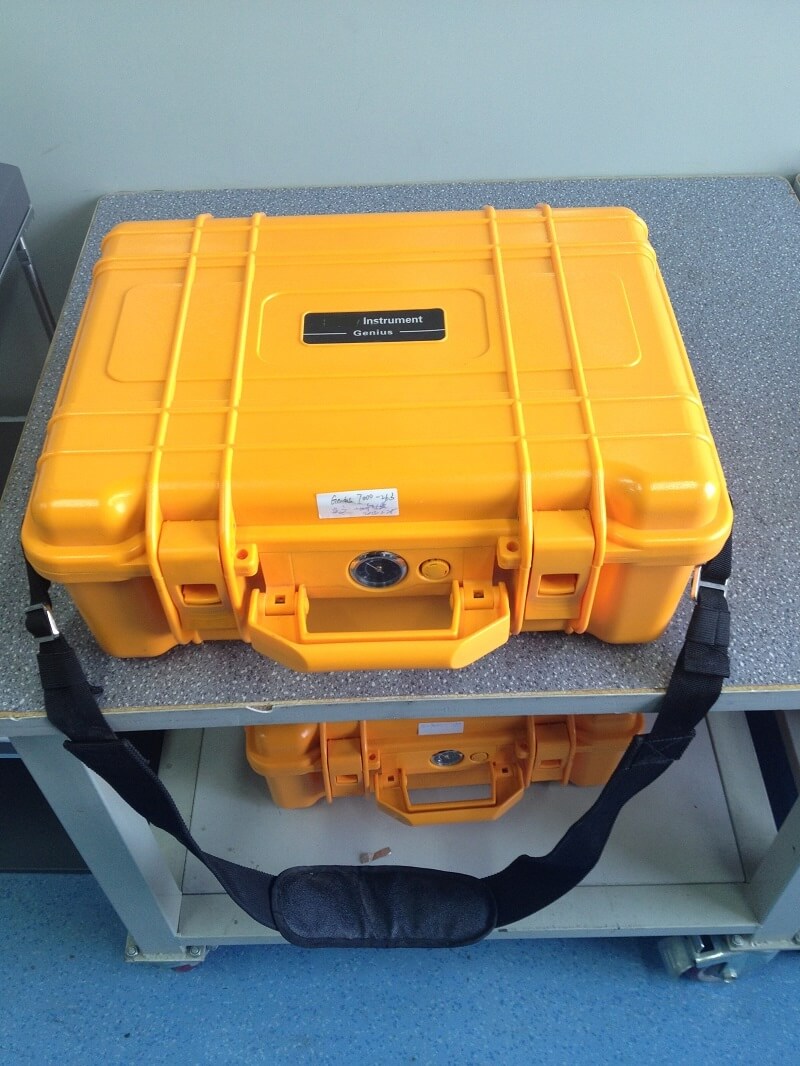
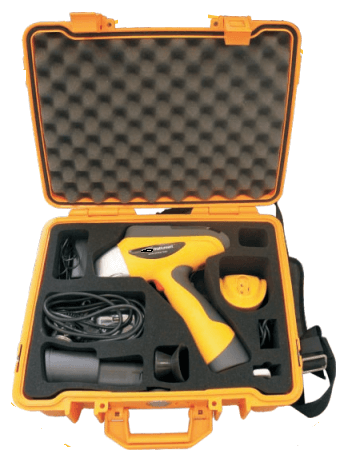
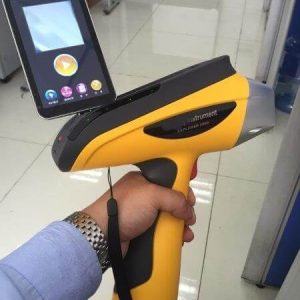
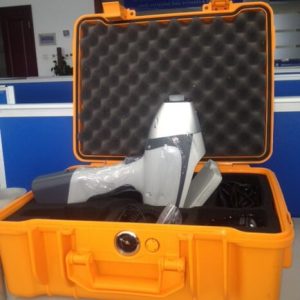
- Light weight, small size, ergonomic handle design, equipped with a special instrument case, which is easier to grasp and more convenient to use in the field.
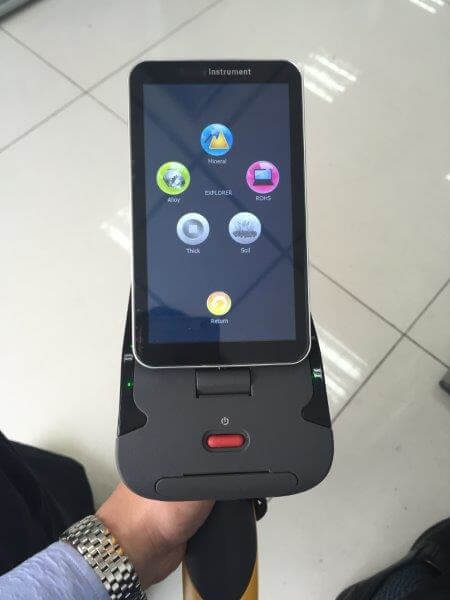
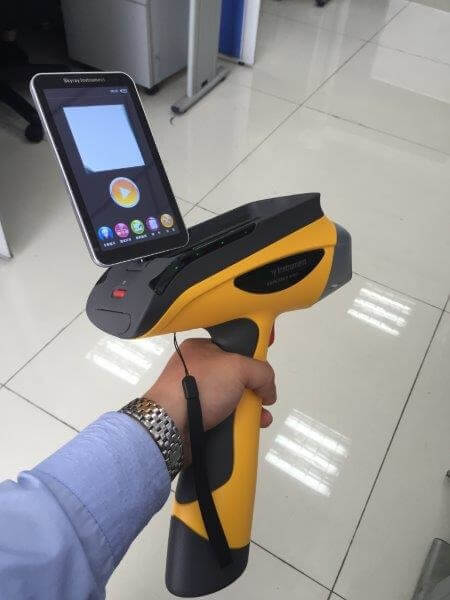
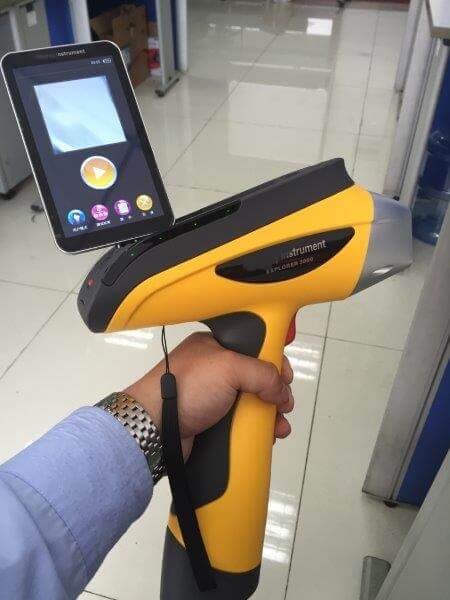
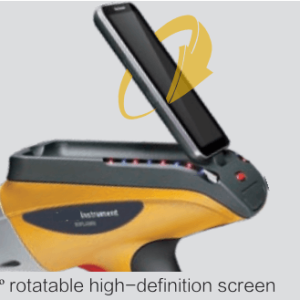
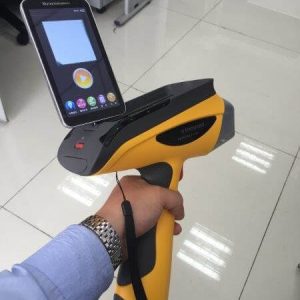
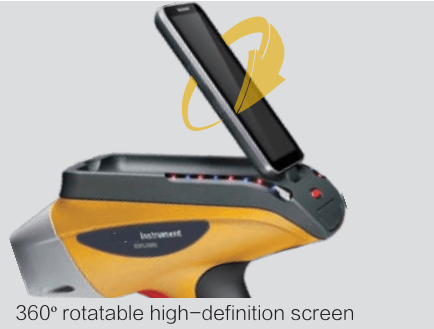
- 5 inch high-definition screen with 360 degree rotation, supports multiple- points- operating, provide clear display at any lights.
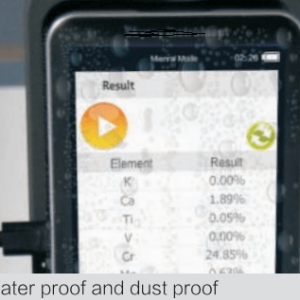
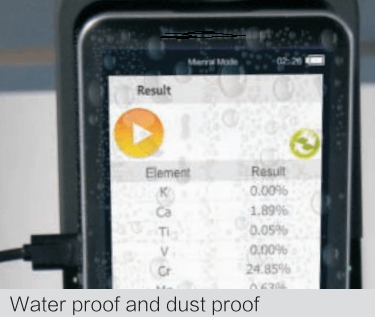
- Integrated design of Seal type, gives benefits of waterproof and dustproof, helps the instruments can be used continuously in any harsh environments.
- No need for sample preparation, directly measures and analyses the surface of goods, its handheld benefit helps the instrument achieve a quick measurement and its test block provides a long time accurate testing.
Better XRF Performance
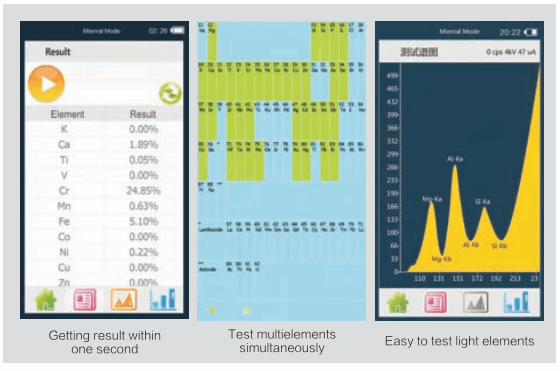
- Rapid nondestructive detection and quick measurement by aiming, report results within one second. The performance is comparable to the bench-top’s performance and detection result is fast and accurate.
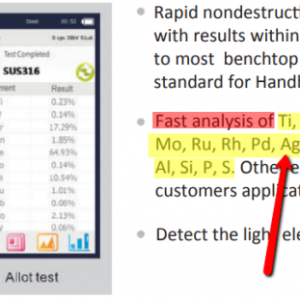
- Simultaneous detection of Ti, V, Cr, Mn, Fe, Co, Ni, Cu, Zn, Ga, Ge, Zr, Nb, Mo, Rh, Pd, Ag, In, Sn, Sb, Hf, Ta, W, Re, Pt, Au, Pb, Bi, Mg, Al, Si, P, S, and can add more elements for customer’ s needs.
- Instrument can run without helium by the ultra near optical path design, and can detector the light elements from the beginning of Mg that fully meets the needs of specific users.
Stronger Battery
- Large lithium battery at 27000mAh could be as a selected configuration; the battery duration working time is up to three days, and it equips with communicator/car charger to ensure supply enough power.
- A Built-in memory battery can continue supply power when replacing the battery.
Higher Configuration
- Four core parts which are Miniature X-ray tube, Fast-SDD detector (the world’s best detector), digital signal processor and micro multi-channel intelligent analysis module, can achieve the accuracy as good as bench-top’s.
- Large data storage is by ultra-high frequency memory and mass storage space. Our new independent research and development Digital multi-channel technology ensure effective mining spectral counts per second is up to 500K cps.
- Collimation filter system, its combination can reach to the limit of 12 groups, to meet the testing requirements of different customers.
- A built-in 500W pixels high definition camera, can observe sample’s testing position at any time that makes the measurement more accurate.
Safer Protection
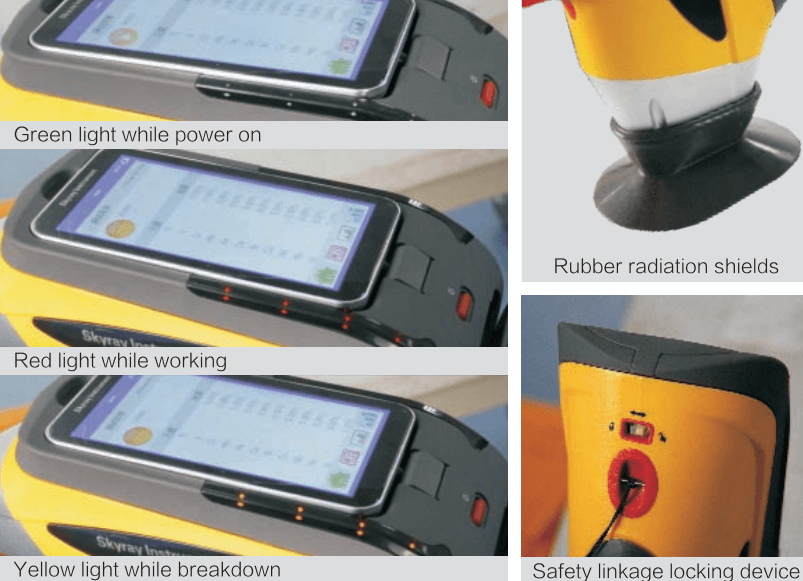
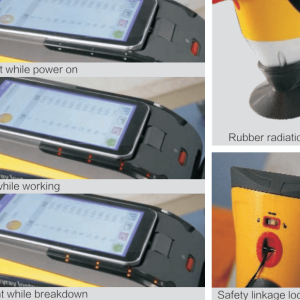
- Intelligent – tricolor – early – warning – system: 360 degrees without dead angle display by LED three – color lamp led design. Instrument status tells by different colors, Green light means power on, red flushing means testing, and yellow flushing means fault of equipment.
- Triple safety protection function:
a:Automatic induction, instrument does not work without sample, no leakage radiation.
b:Thicken – preventing – testing – wall can effectively prevent the scattering.
c:Safety – protection – cover can prevent the surrounding light matrix scattering.
- Security – linkage – locking device protects your security; it can guard the final checkpoint if the software is unable to control the instrument turn off.
More intelligent software
- The 911MPEXRF700 ore analyzer is equipped with professional application software, specifically for ore industry; the feature is intelligent, high sensitivity, fast testing time, and easy operation.
- Brand new knowledge ware is one key operation with dual mode design ( user mode and expert mode ). User mode uses for recognizing categories of sample by one key operation; Expert mode uses for increasing the elements and increasing the specific in-depth analysis of the operation curve.
- Internal intensity correction method can correct deviation caused by uneven sample of different geometries, densities and structures.
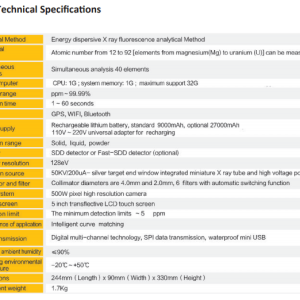
HANDHELD XRF ANALYZER SPECIFICATIONS
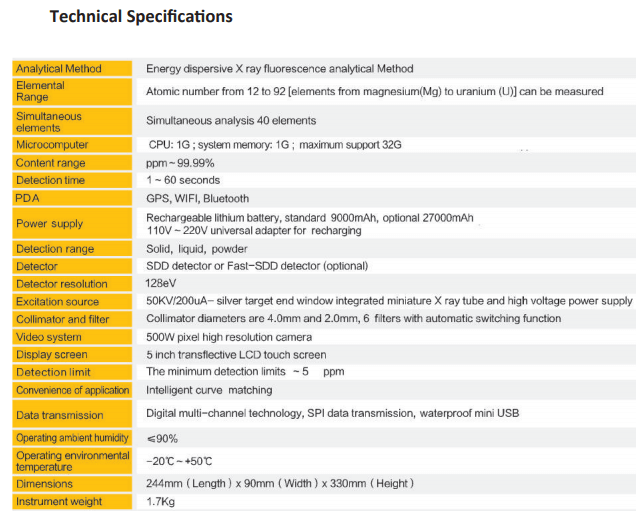
| Analytical Method |
Energy dispersive X ray fluorescence analytical Method |
| Elements Measuring Range |
Atomic number from 12 to 92 [elements from magnesium (Mg) to uranium (U)] can be measured |
| Simultaneous detector elements |
Simultaneous analyze 40 elements |
| Microcomputer system |
Customized system; CPU; 1G; system memory: 1G: extended stored maximum support 32G; standard 4G for mass storage data |
| The content range |
Ppm-99.99% |
| The detection time |
1-60 seconds (one second report results) |
| A built-in system |
GPS,WIFI, Bluetooth |
| Power Supply |
Rechargeable lithium battery, standard is 9000mAh, sustainable work up to 12 hours; optional is 27000mAh super-battery with wide voltage 110V – 220V universal adapter for recharging power supply |
| Detection Objective |
Solid, liquid, powder |
| Detector |
SDD detector or Fast-SDD detector (optional) |
| Detector resolution |
Minimum can reach 128eV |
| The excitation source |
50KV/200uA- silver target end window integrated miniature X-ray tube and high voltage power supply |
| Collimator and filter |
collimator diameters are 4.0mm and 2.0mm, 6 kinds of filters with automatic switching functions |
| Video system |
500W pixel high resolution camera |
| Display Screen |
Brand new 5 inch semi-reflecting and semi-transmitting LCD touch screen, its resolution is 1080*720. |
| Detection limit |
The minimum detection limits at 1 – 500 ppm |
| Safety |
Multiple safety protection, no tests, no radiation, radiation levels at work are far below the international safety standards, and has no sample telemetry, automatic -turn -off X-Ray tube function. Standard radiation shields, thickened instrument’s alloy testing wall |
| Specialty |
Special edition of ore’s analytical software, and intellectualized one- key- testing. |
| Convenience of application |
No need to select curves, intellectualized one- key-selecting will select the best matching curve |
| Data transmission |
Digital multi-channel technology, SPI data transmission, quick analysis, the high count rate: waterproof mini USB, and can be connected with a desktop computer |
| Operating ambient humidity |
<90% |
| Operating environmental temperature |
-20°C -+ 50°C |
| Instrument dimension |
244 mm (Length) x 90 mm (Width) x 330 mm (Height) |
| Instrument Weight |
1.7Kg |
| Intelligent warning signals Indicator system |
Green light means power on, red flushing means testing and yellow flushing means the errors |
| Accessories |
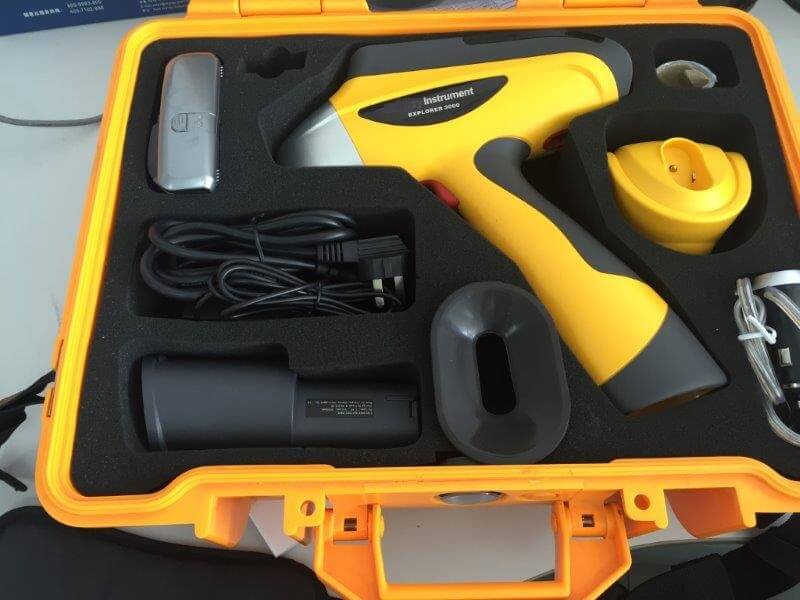
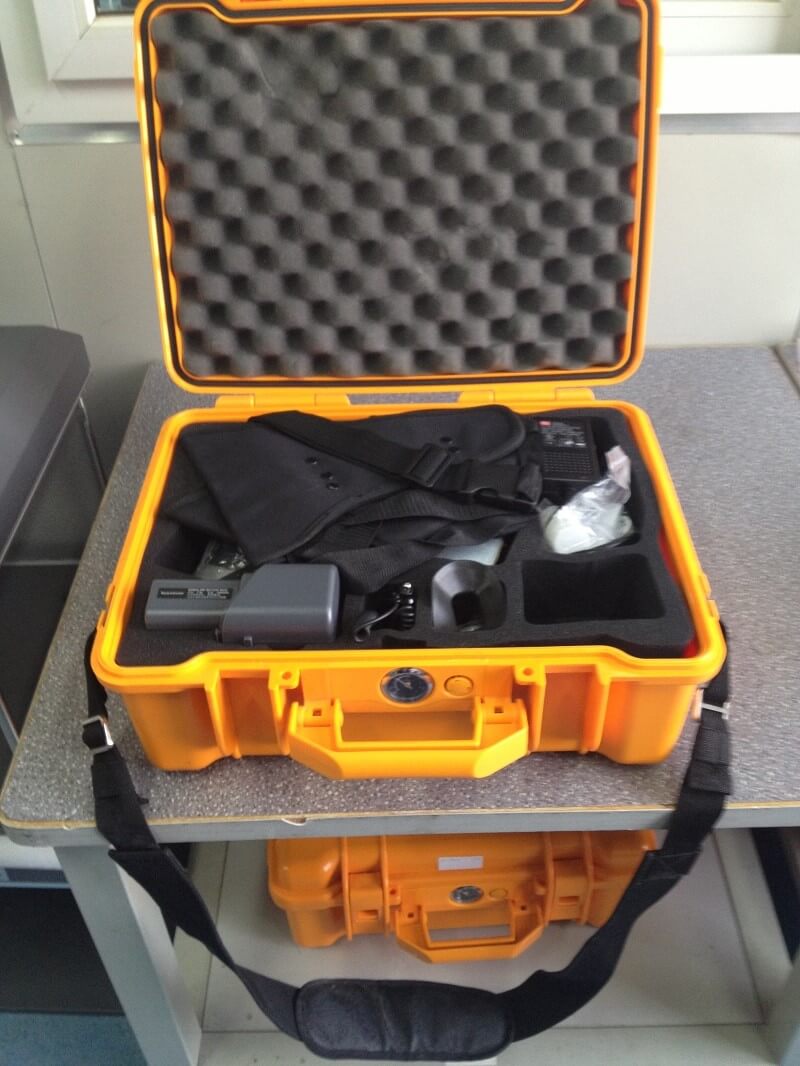
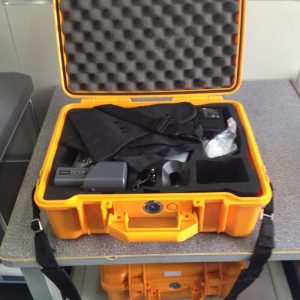
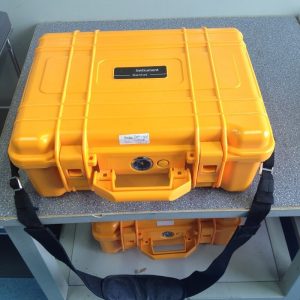
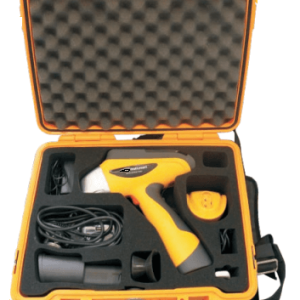
Three-military-protection-box is compression, waterproof and shock absorption. Universal charger and car charger, 4G SD memory card and card reader
Two lithium battery and charger, PDA accessories, radiation shield. Optional accessories: the large battery, seat type test support, Bluetooth printer, mill, manual pressure machine, and different meshes of sieves |
 HANDHELD XRF ANALYZER ACCESSORIES
XRF ANALYSER OVERVIEW
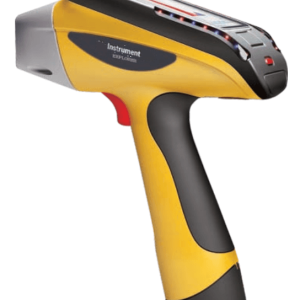
The new generation of Explorer XRF portable X-ray fluorescence spectrometer series is mainly used for metal materials reliability identification, alloy grades rapid identification, soil heavy-metals field testing and field in situ multi-element analysis for various geological ore, fully meeting the market demand from raw materials testing, process control to field online analysis of various elemental composition in product testing.
Advantages
- The introduction of 3 core technologies, miniature low-power end-window integrated X-ray tube, large area beryllium-window silicon drift detector (SDD) and miniature multi-channel digital signal processor, has significantly saved test time, improved the detection accuracy and reduced the errors, which enables the portable analyzers possess paralleled performance to desktop analyzers.
- Small in size and easy to carry
- On-site and in situ analysis arbitrarily at any time and any place
- Non-destructive testing
- 1-2 s rapid portable analysis ,longer time fine testing by bench-top measurement
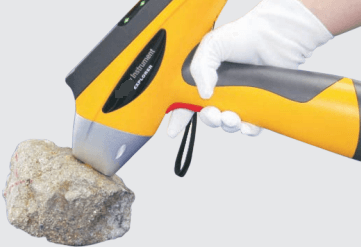
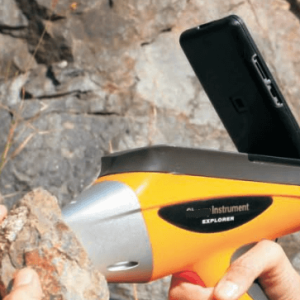
- Measurement can be directly carried out on the sample surface in field analysis, without additional sample preparation, which suits samples of any type, such as electrical and electric products, alloys, geology and mineral resources, soil, rock, residue, small solid particles, and liquid sediment.
- Built-in HD camera for ease of viewing the testing point
- The multiple measurement modes to choose from and unlimited number of modes to add at will, together with its automatic matching feature, help achieve easy one-button measurement. Its built-in intensity correction method can correct all deviations from samples of irregular geometric shape and uneven structure and density.
- Innovative software interface and core combining EC with FP software has a wider application, with high sensitivity, short test time, easy operation, less restriction for the operator.
- 12 collimator&filter combination.
- Embedded Windows CE system, high resolution LCD touch screen, digital multi-channel technology and SPI data transmission greatly raise the data transmission and data processing ability. Wherever you are, the measurement data is all at your reach.
- Triple security: auto-sensing, blank test, two-seconds auto-off X-ray tube with radiation level far below international safety standards, no radiation leakage; thicker protective wall. Protective safety hood.
- Two large-capacity 9000mAH lithium batteries can work for 8 hours continuously. Equipped with a wide-voltage AC charger or car-loaded charger ensure test at anytime, anywhere.
- Warning indicator system. Powered, the green light is on; testing,the red light flashes to prevent error.
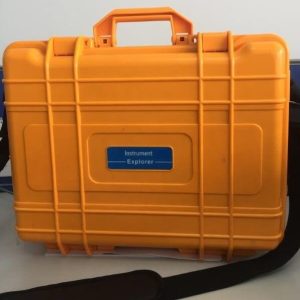
- The instrument is of waterproof, dustproof and works continuously in an environment of high temperature and high humidity. Its protective box uses high strength military supplies with good waterproof, shockproof, anti-pressure function,
Unpacking
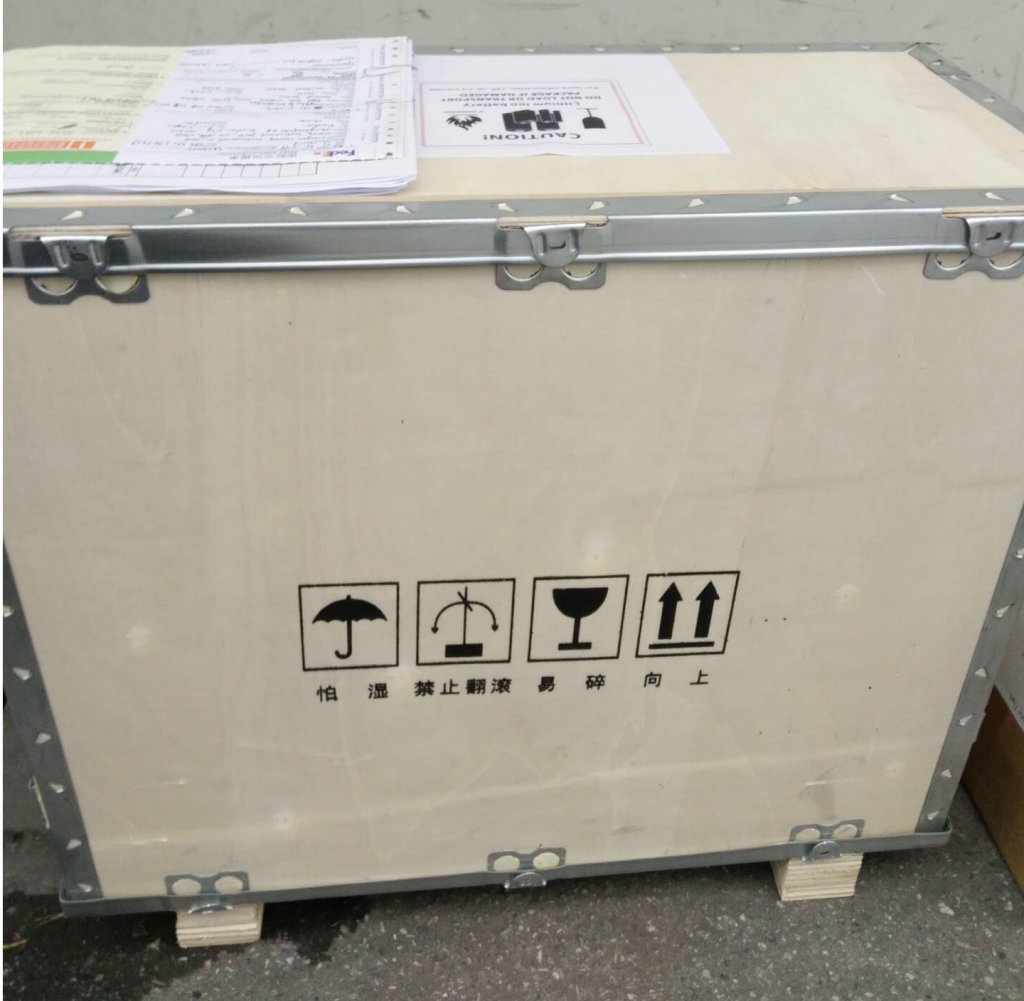
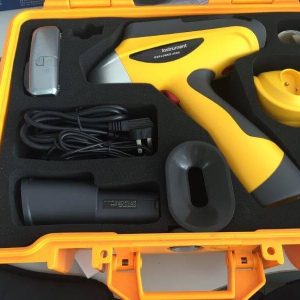
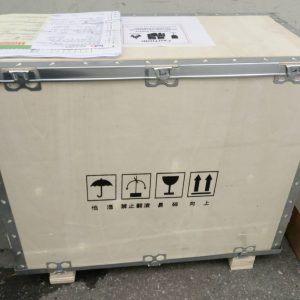
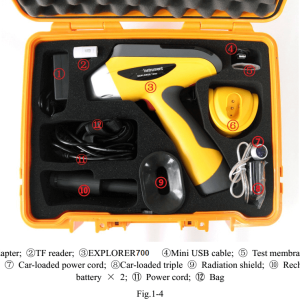
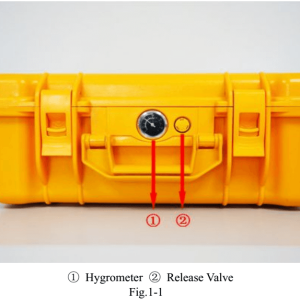
Open the sealed packing case and you will see the included items.
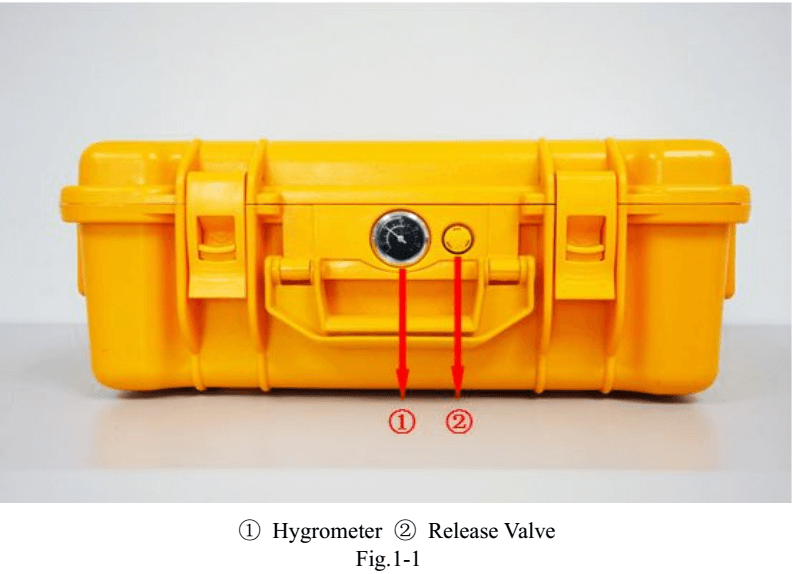
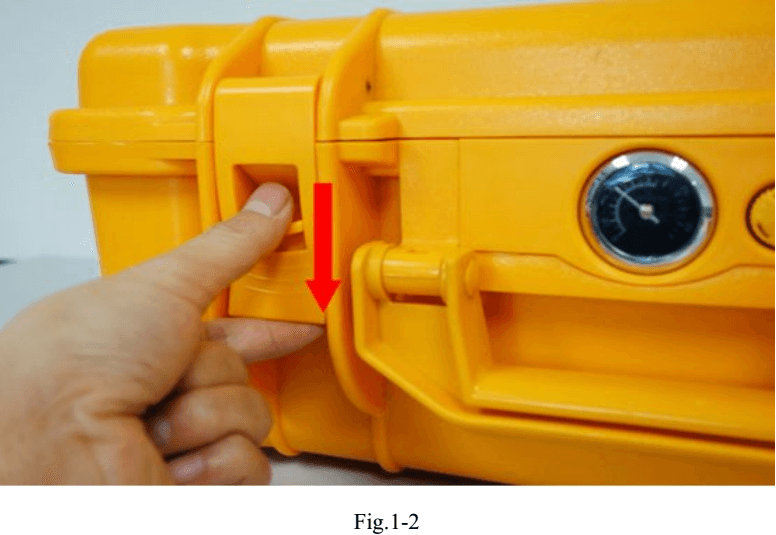
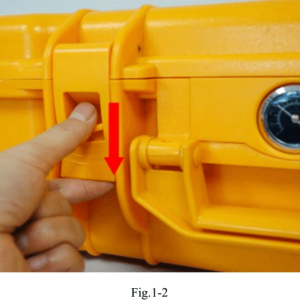
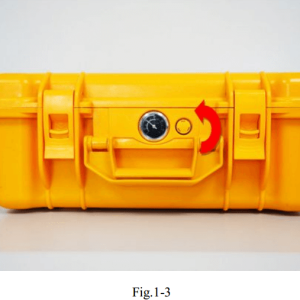
To open the case, push down the lock switch as below.
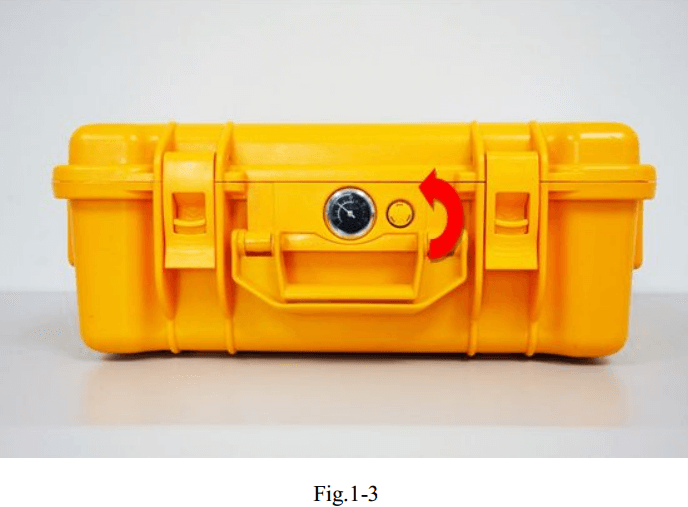
Counter-clockwise rotate the release valve to open the case, as shown below, for the case is sealed, the pressure inside sometimes lower than the outside:
Unpack it, find the following:
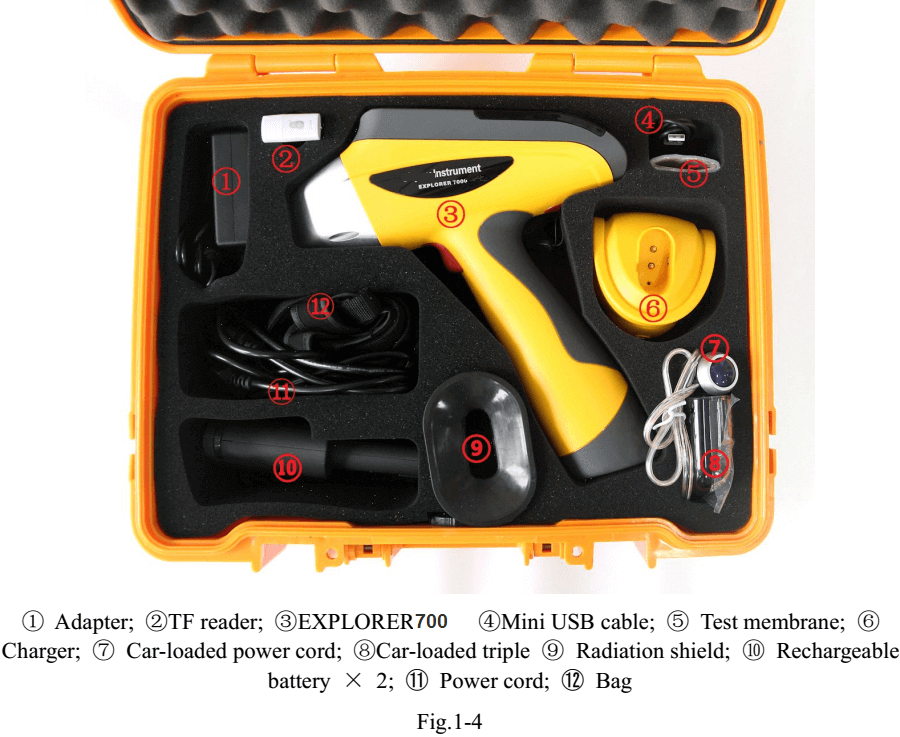 Any discrepancies with the product packing list, please contact us.
STRUCTURE AND PRINCIPLE
Instrument Overview
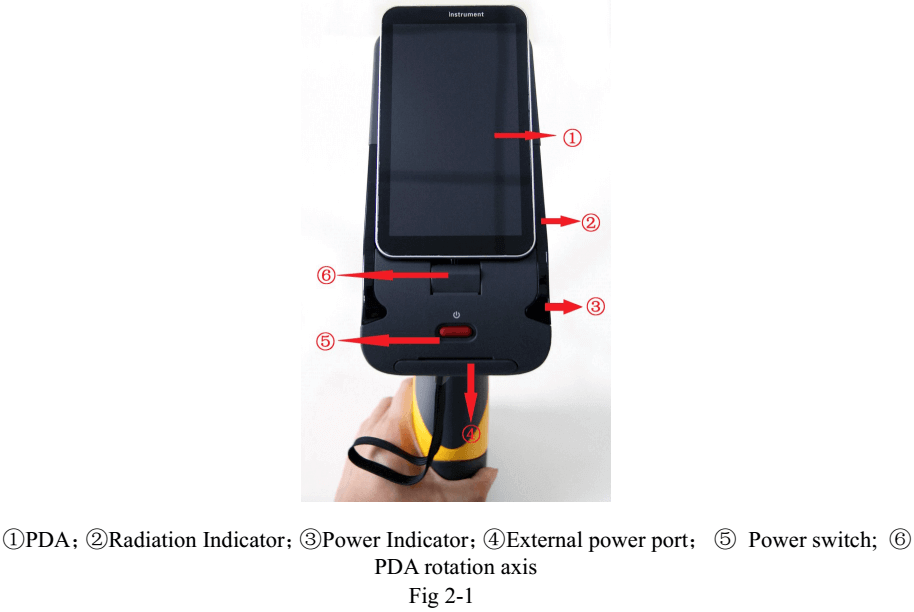
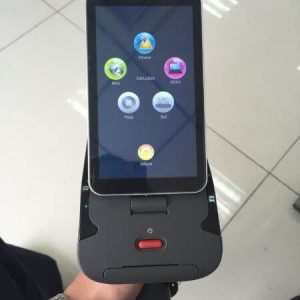
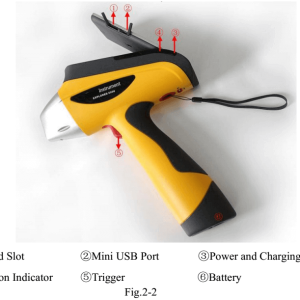
- PDA – the embedded PDA installed with the dedicated X-ray fluorescence analytical software is used for instrument control,data processing and result display.
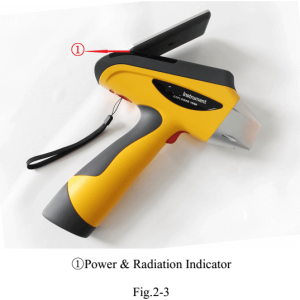
- Power&Charging indicator -If powered, the power indicator is green. If unpowered, plug in the battery and adapter, in case the battery is low, the indicator flashes green; under this condition power the instrument,the power and charging indicator turn orange.
- Radiation Indicator – when HV power is applied on the X-ray tube, the radiation indicator flashes red. Otherwise, constantly green.
- Power Button – turns on/off the power supply .
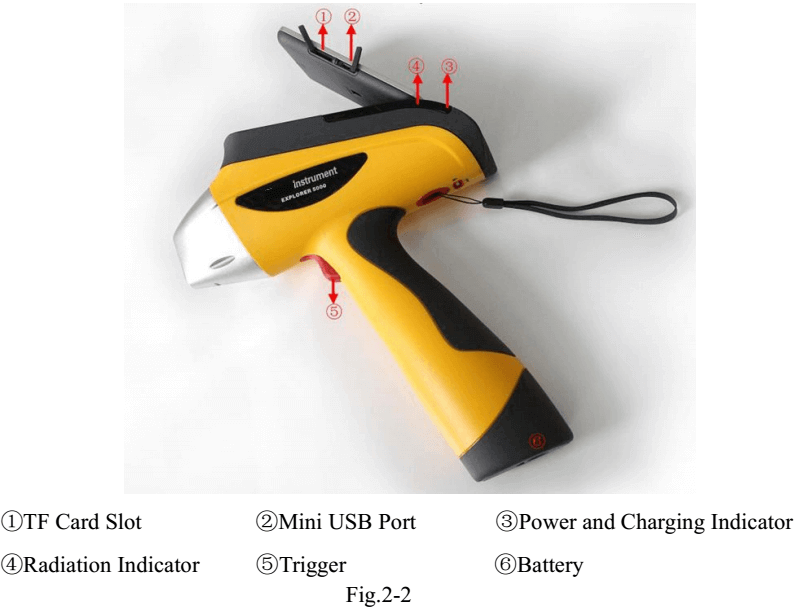
Left view
- TF Card Slot – insert a TF card to copy, backup or update software.
- Mini USB Port – synchronize with the PC via Mini USB cable after install the related divers.
- Trigger – pull the trigger to start the measurement automatically when the instrument is powered.
- Battery – power the instrument.
Right view
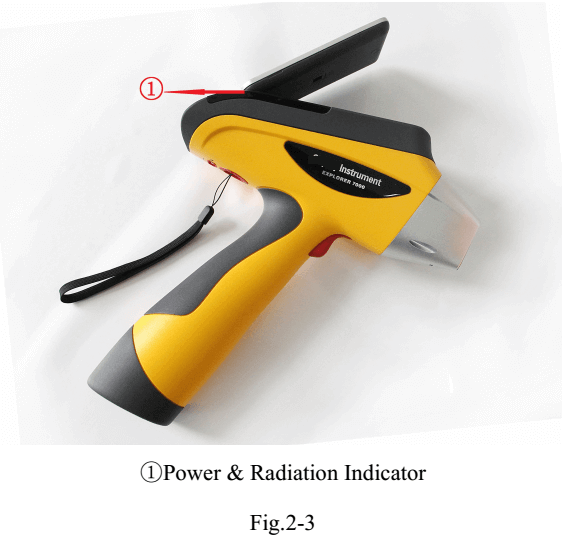 Radiation Indicator – when HV power is applied on the X-ray tube, the radiation indicator flashes red. Otherwise, constantly green.
Front View
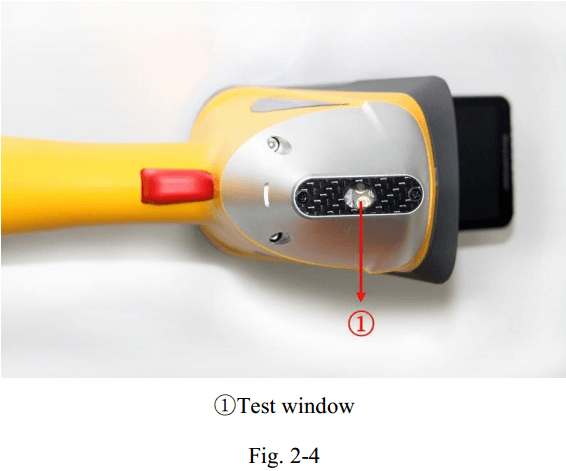
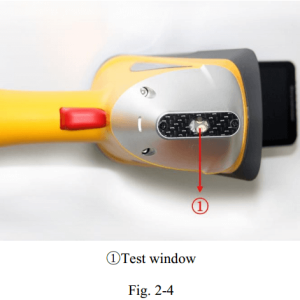
Test window: where sample is placed
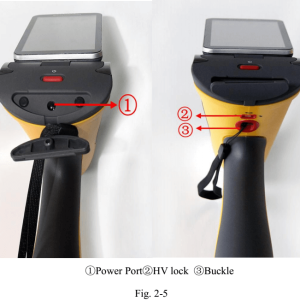
Rear view
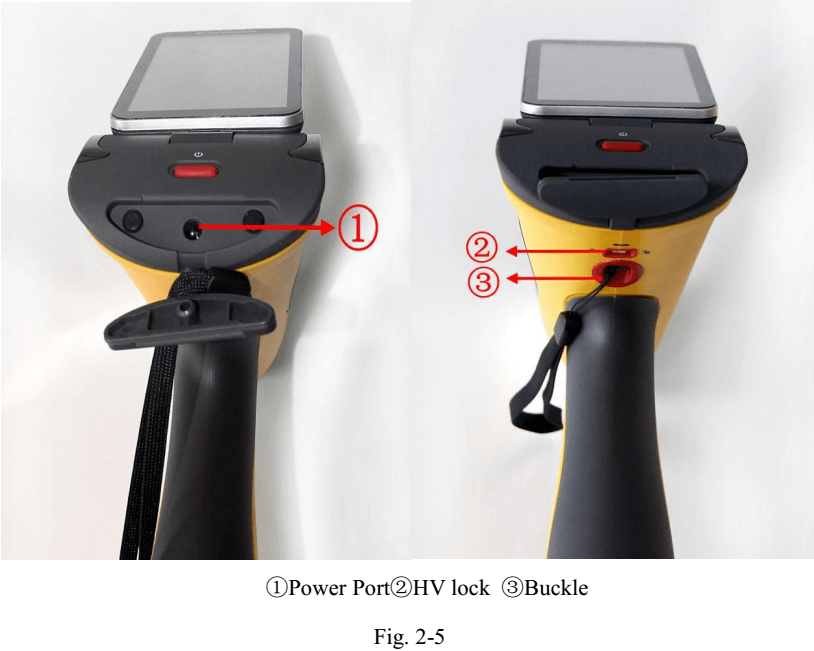
- Power Port – adapter power port, for powering the instrument.
- HV lock-unlocked, HV works properly; lock, HV is in an inactive state.
- Buckle- for external PDA touch pen and security strap (to avoid instrument falling when testing).
Working Principle
EDX (Energy Dispersive Spectrometry) X-ray spectrometer is based on the principle of X-ray fluorescence (XRF).
XRF principle: the atoms illuminated by high-energy X-ray emit X-ray spectra with a certain characteristics, the wavelength of which is only related to the atomic number of element, not X-ray excitation energy. Therefore, by determine the wavelength, we find what contained in the sample and start the qualitative analysis; by measuring the line intensity and comparing with a known standard, we know the content of the element and start the quantitative analysis.
Explorer 7000 working principle: Integrated miniature X-ray source provides tube voltage and tube current, the light tube emits continuous X-spectral lines, X-rays irradiating to the sample produce X-ray fluorescence with sample characteristics, transforming into voltage signals through the detector, the signal, after being amplified and data acquisition, is sent for computer processing to get the required test data.
System Components
The instrument is constructed mainly by three systems: excitation system, optics system and detection system.
Excitation System
The excitation system, including miniature X-ray source, filter and collimator, is used to generate X-rays.
Optics System
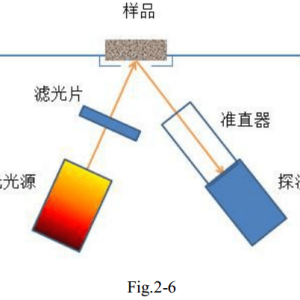
Here is the schematic diagram of optics system.
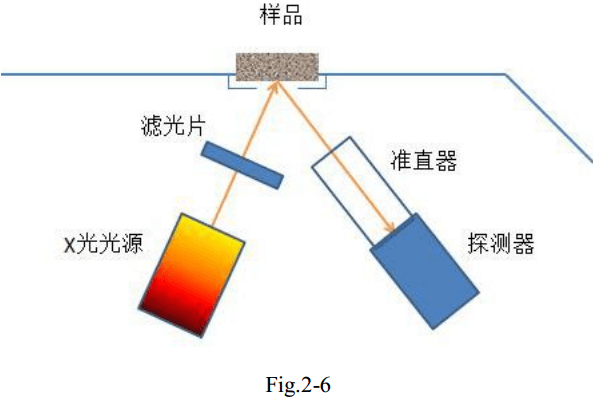
Switch the combination of filter and collimator by software.
Detection System
Mainly include:
- AMP and digital multi-channel data acquisition system – Get the signal and digitalize it by amplifying the counter.
- Embedded PDA – Equipped with dedicated X-ray fluorescence analytical software, it can control the instrument operations, process info and display results.
TECHNICAL SPECIFICATIONS
Standard configuration
- AMP and digital multi-channel system
- Power and control system
- Embedded PDA
- Dedicated XRF analytical software(PDA version)
- Laboratory test bracket (optional)
- 110V/220V universal adapter
- 2x 9000mAh li-ion battery, 1 li-ion charger(27000mAh large-capacity battery is optional)
- Large-capacity TF storage card and TF reader
- Anti-shock, anti-pressure, water-proof lockable portable case
Specification
- Analysis method: ED-XRF
- Detector: 25mm², 0.3mil, SDD, resolution ≥ 139eV
- Excitation source: 50KV/200uA micro-Ag target and end-window integrated X-ray tube and HV power supply
- Element range: all elements from Mg to U
- Measurement time:1-60 s
- Sample type: solid, liquid, powder
- Detection limit: down to ppm level
- Concentration range: 1ppm~99.99%
- Calibration method: Ag
- CPU:1 GHz
- Memory: 1G, extended memory for 32G max. (standard 4G)
- Control:One-touch test, no need to select a specific test mode
- Ambient humidity: <90%
- Ambient temperature: -20°C∼ +50 °C
Parameters
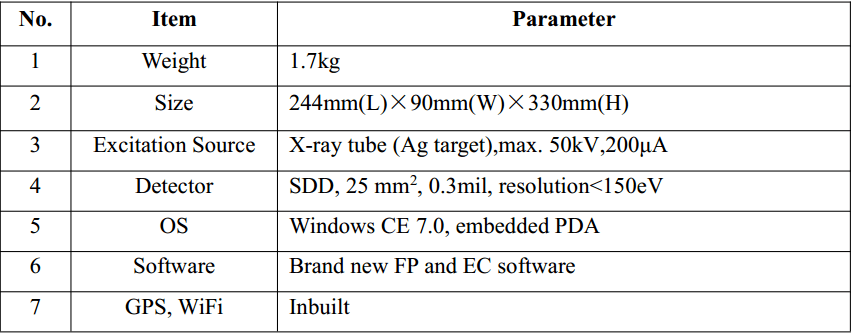
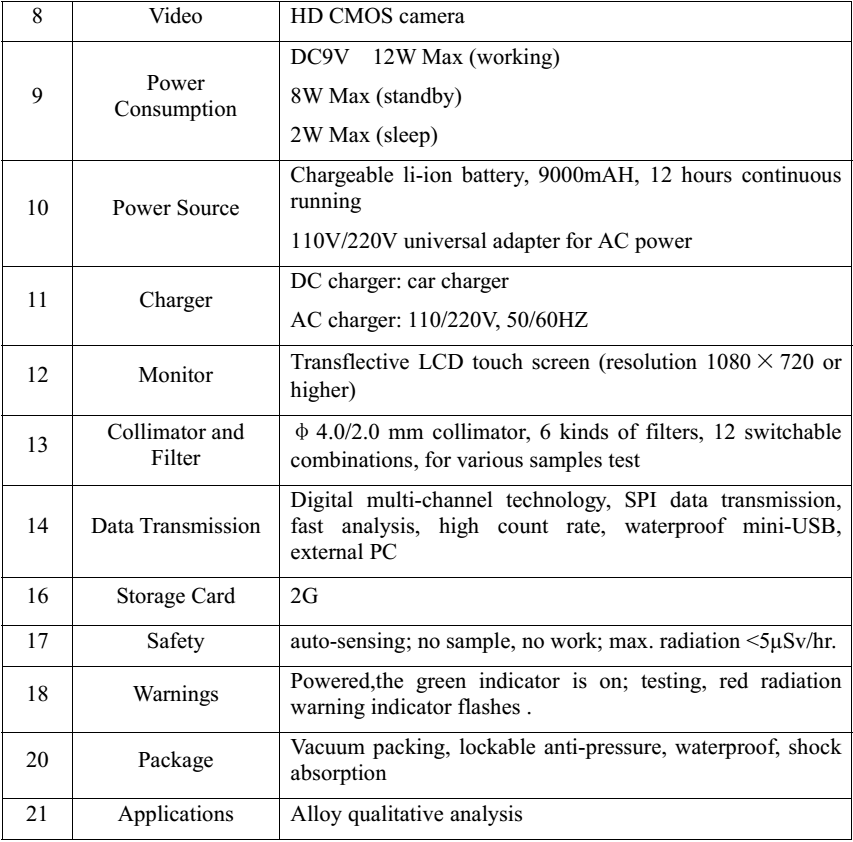
BASIC OPERATIONS
Battery
Assembly
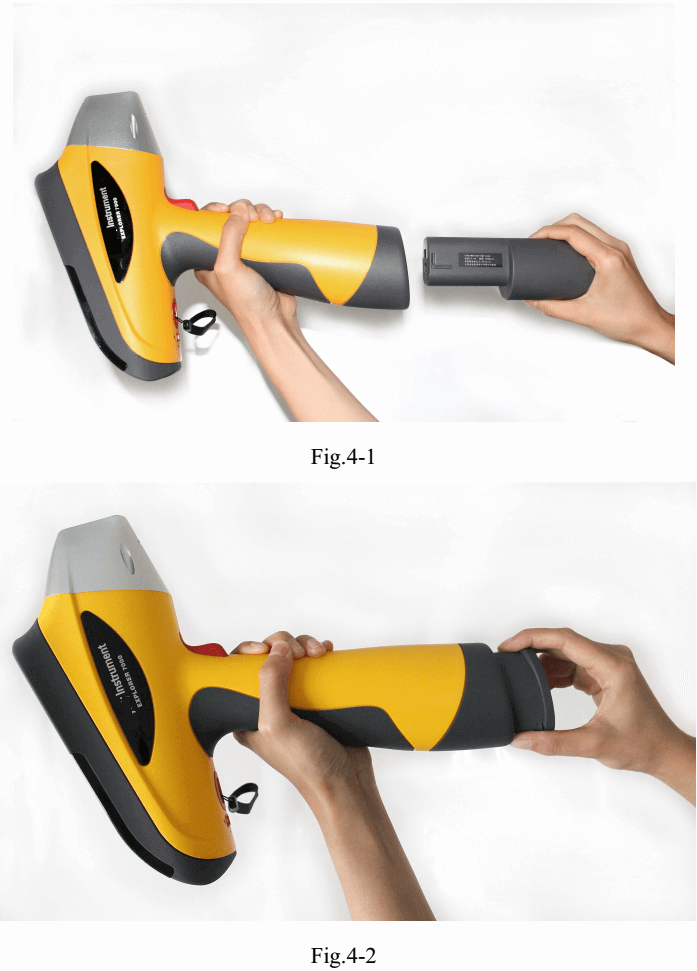
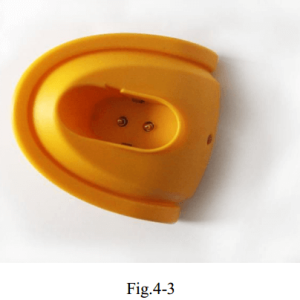
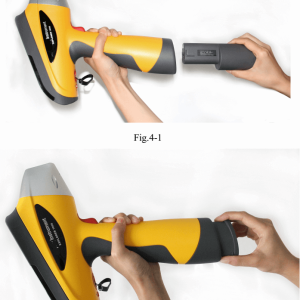
Take the instrument out of the packing case. Insert the battery into the handle of the instrument as below.
Charging
To charge the battery when out of power:
1) Take out the battery charger.
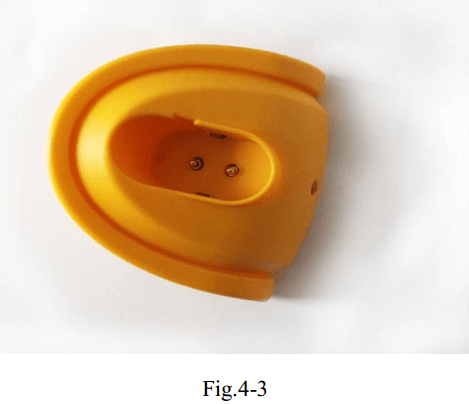
2) Insert the battery
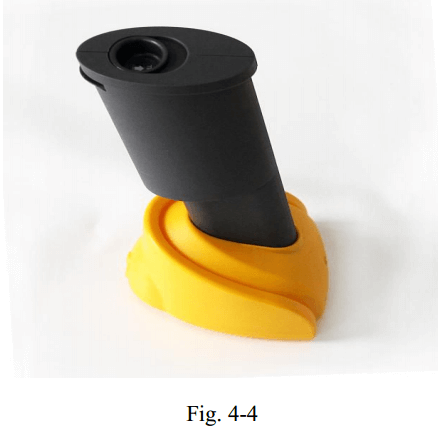
3) Connect the charger and adapter, and connect to the utility power to charge power (red light is on).
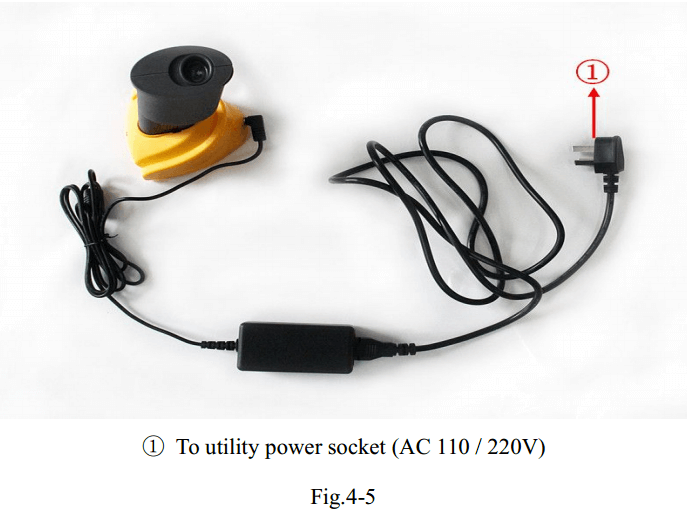
Use of adapter
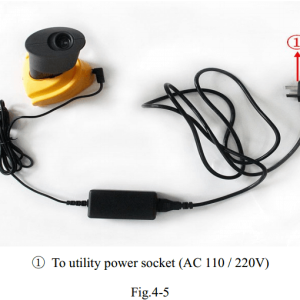
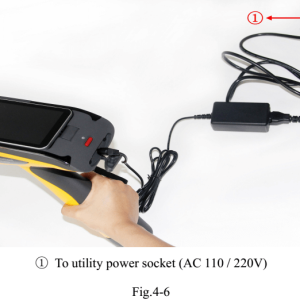
Adapter is optional for powering the instrument,connected as below.
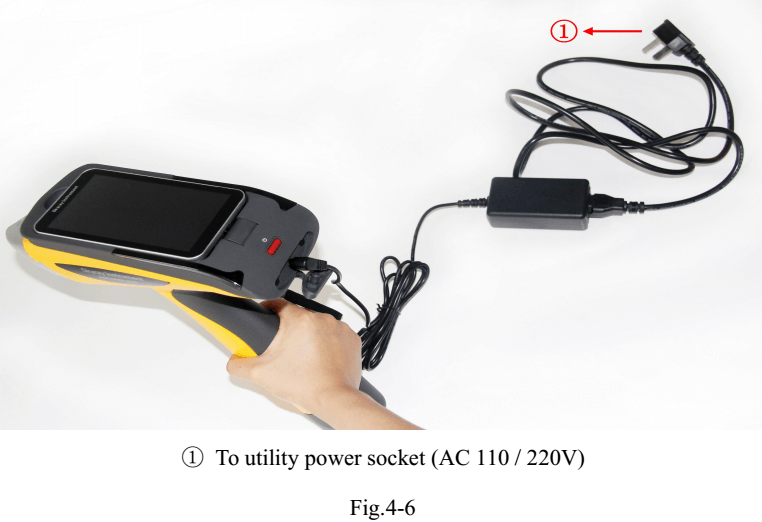
 For security, be sure to use the supplied adapter and battery charger. Using a different power cord or battery charger could cause malfunctions or danger.
ON/OFF
Before turn on the instrument, please make sure the instrument has been properly connected to battery or A/C adapter. By pressing the power button for about 3 s, the green power indicator is on, then enter the login interface.
Similarly, to turn off the instrument, press the power button for about 3s and release, the green power indicator turns off.
In case the instrument is turned on, idle the instrument for 5 minutes, the instrument will enter Sleep state.
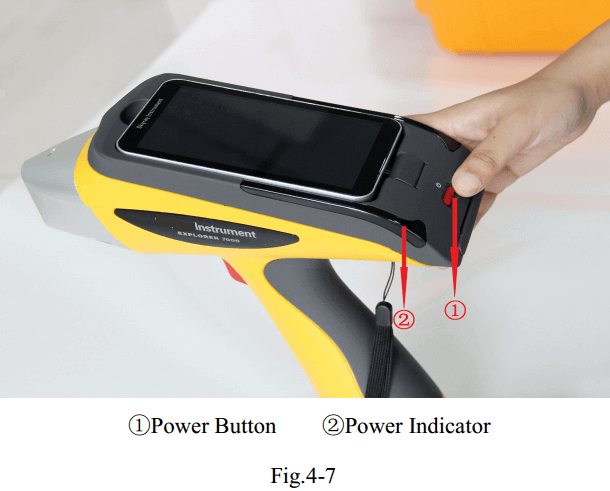 NOTE: Gently press the power button. Do not force too much to avoid damaging the button.
Conditions
- Ambient temperature & humidity requirements:
Operating temperature: -20C ~ + 50C
Operating humidity: ≤ 90% (non-condensing)
- Keep the installation, use environment clean to prevent corrosive gas;
- Prevent static damage and strong electromagnetic interference on the instrument.
Sample Preparation
For qualitative analysis of the elements in the sample ,whether it is a natural one or in strange shape, this instrument can be directly used for test. But for accurate quantitative analysis, we need to do some sample processing.
X-ray fluorescence analysis is sort of a comparative measurement which needs standard sample as reference, the geometry conditions of both need to be consistent. Therefore, the measurement for the natural sample in the field will be comparatively less accurate,while in the lab, we get better results.
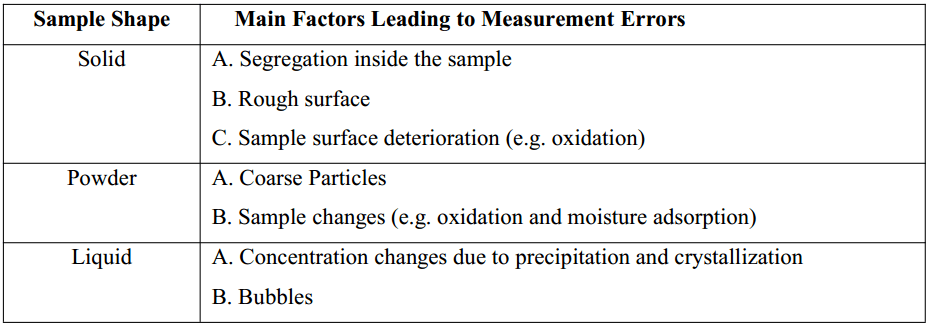
Solid Sample
To make solid samples, such as steel, copper alloys, aluminum alloys and precious metals, the method is to lathe them to cylinders and have one end polished
Before analysis, do not touch the polished surface to avoid oil stains which would affect the accuracy of measurement. If it has been stained, wipe it clean with a soft clean cloth.
Powder Sample
Including slag, dust, ash, cement and lime,etc. Typical sample preparation order: Batch → Multiple particles → Bulks → Pulverization and splitting → Sample preparation → Measurement. For optimum measurement results, the size of powder samples should be preferably below 200 Mesh.
Generally, directly place the powder sample in the cups for analysis. Another method is to make tablets, which will bring accurate results.
Liquid Sample
There are three preparation methods for liquid samples.
- Direct – pour liquid samples directly into the cups for analysis.
- Enrichment – enrich the elements to be analyzed by using copper reagent or ion-exchange resin method,etc.
- Drip – drip drops of liquid sample on the filter paper for analysis.
We sometimes intentionally add some element into the sample as an internal standard, which is known as internal standard method.
Sample handling
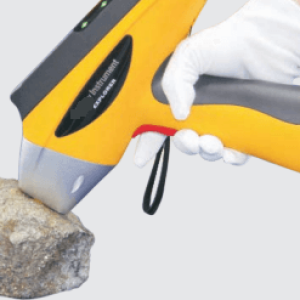
You can measure directly by placing the nosepiece near the sample during mobile operation (i.e., real-time mobile detection by holding the instrument in hand) But be careful not let the irregular barbed samples pierce the test film, which may cause damage to the beryllium window.
During stationary operation (i.e. install the instrument on a bracket), note the following points:
- Avoid splashing liquid or dropping foreign objects into the instrument. Otherwise, it might cause inaccuracies, even malfunctions.
- Handle gently. Better use tools (e.g. tweezer) to avoid damaging the test film.
SOFTWARE INTRODUCTION
Software interface appears after booting. Explorer 5000 software is fitted in the embedded PDA, bind with WIN CE 7.0 platform, no need for installation.
Power on
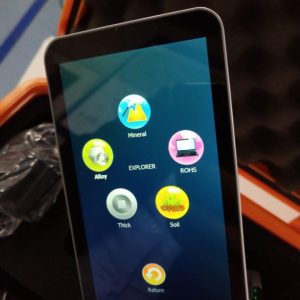
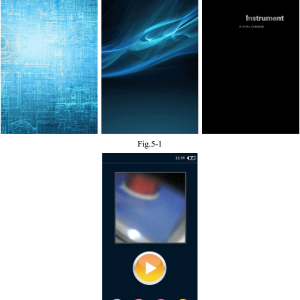
Press switch button for 3 seconds to enter Starting interface, the interfaces switching as shown in Figure 5-1. After booting, the software automatically starts and enters the software user mode (Figure 5-2).
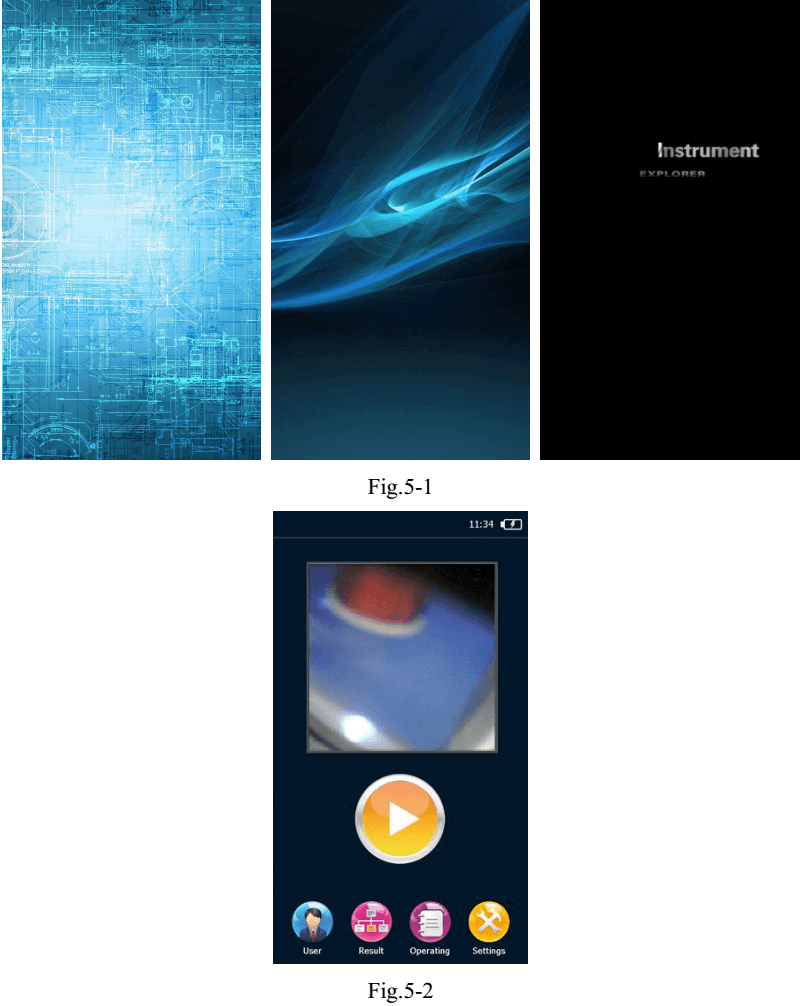
User mode interface
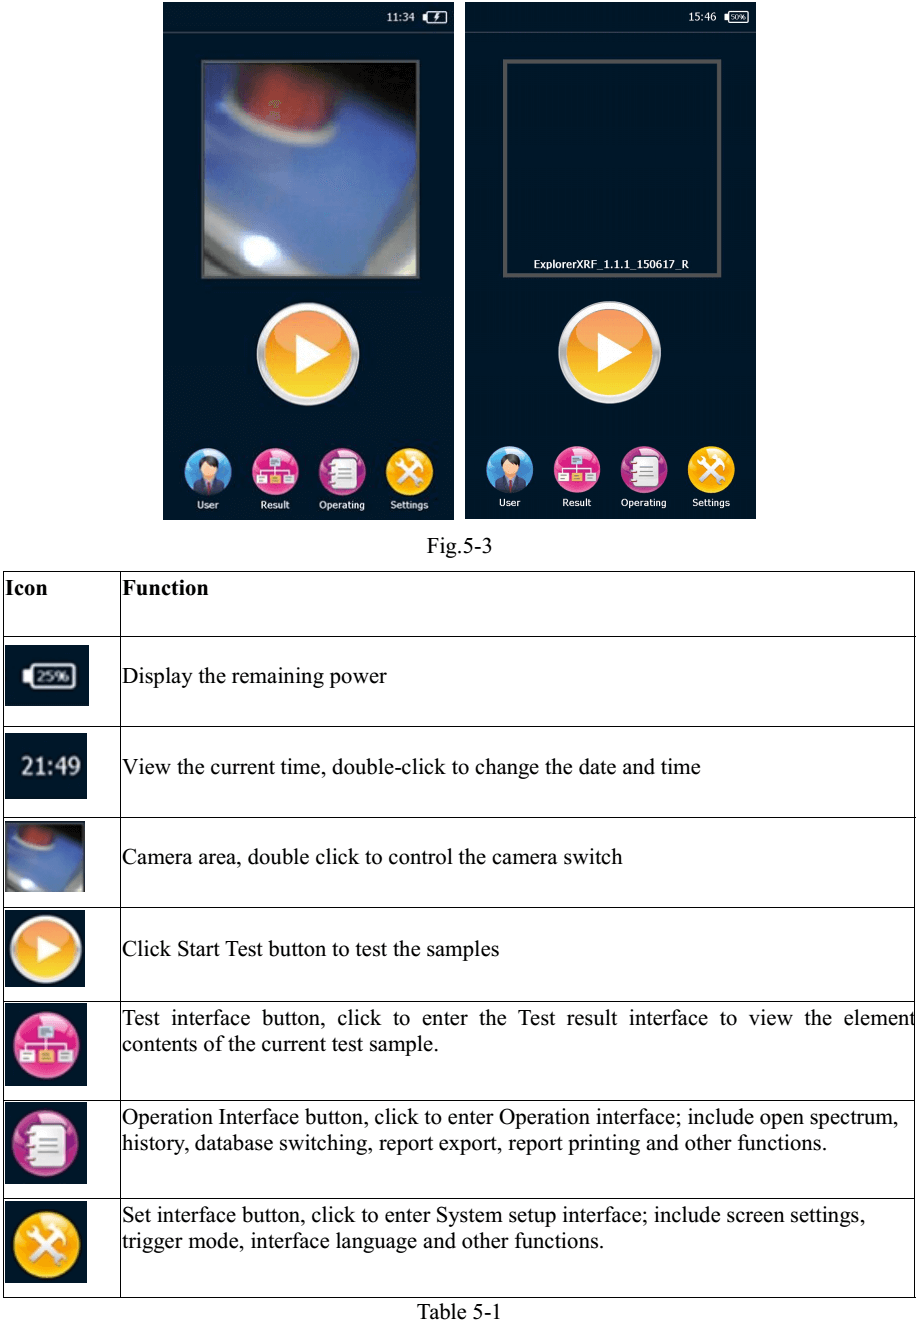
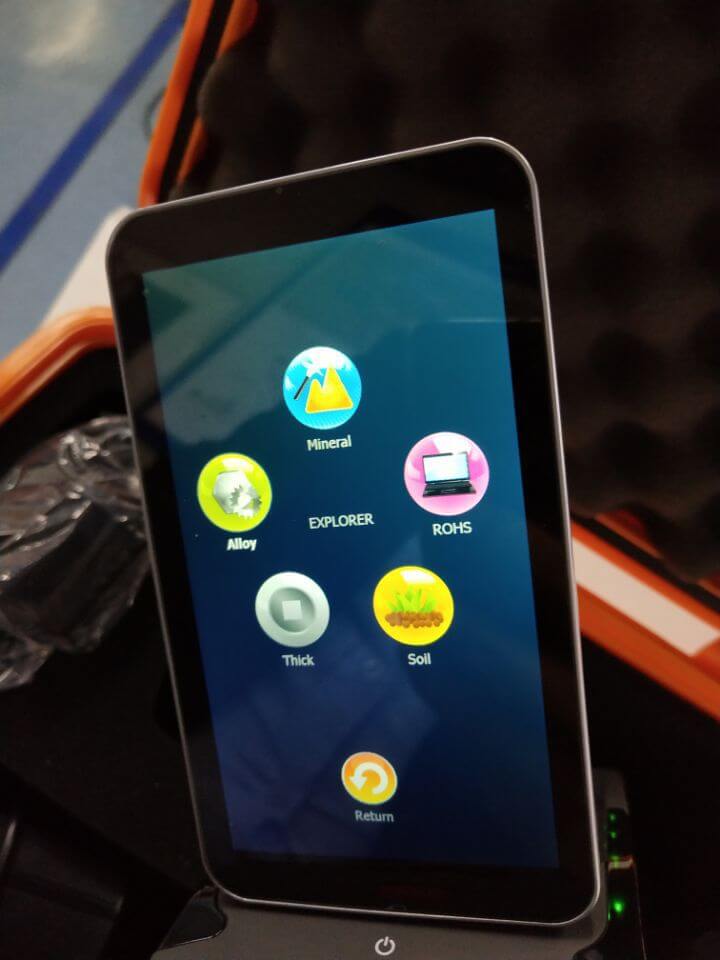
Enter user mode interface, as shown in Figure 5-3, icon functions are listed in Table 5-1.
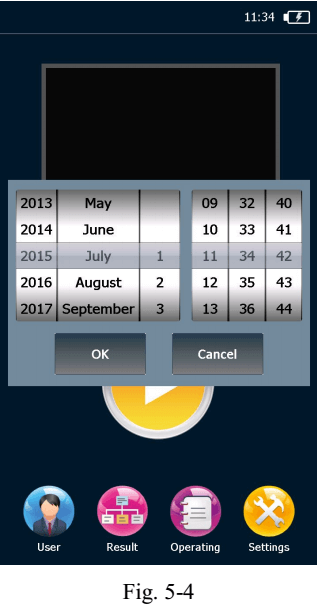
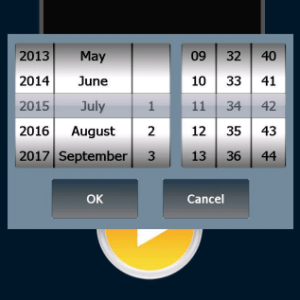
Date & Time settings is as shown in Figure 5-4, slide the Date & Time display column to change value, then click OK.
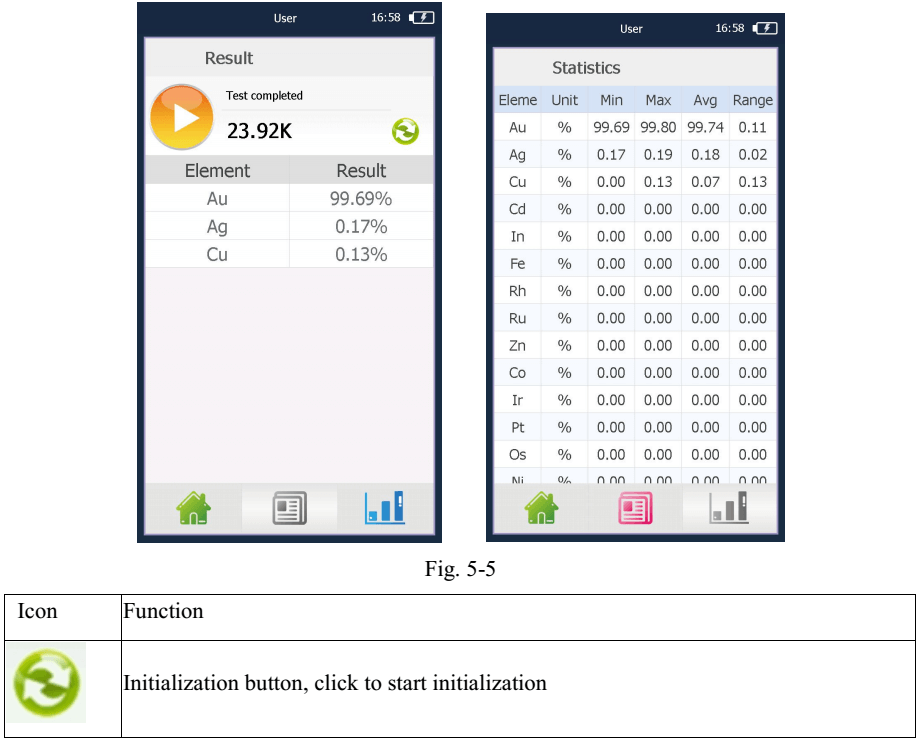
Test result
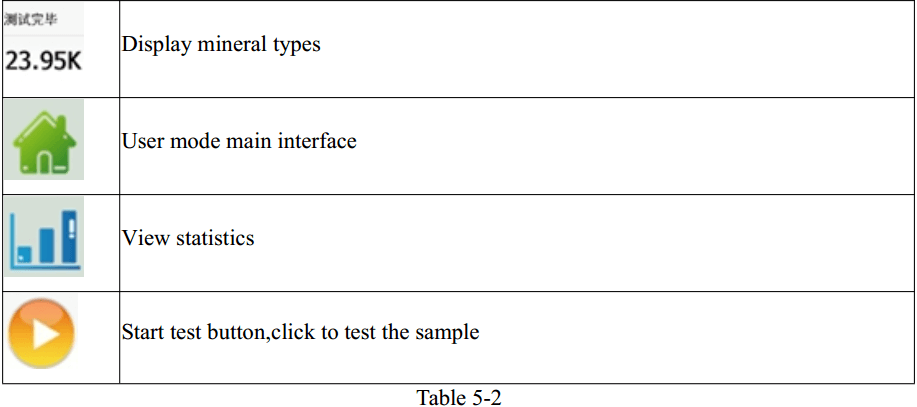
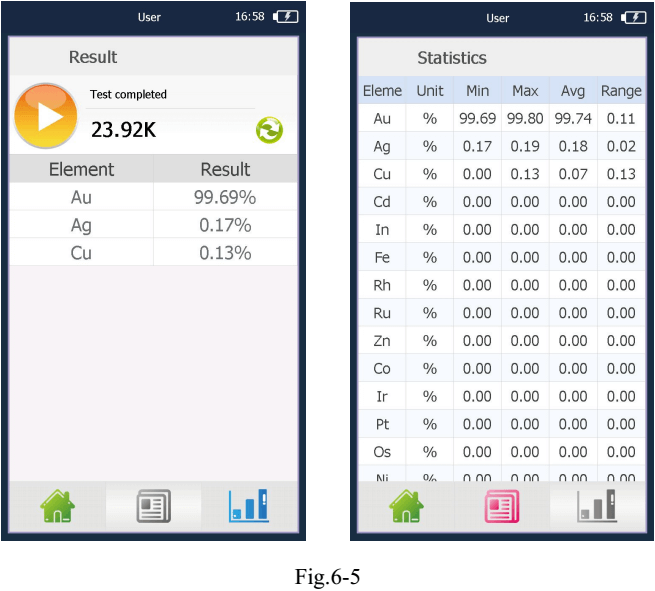
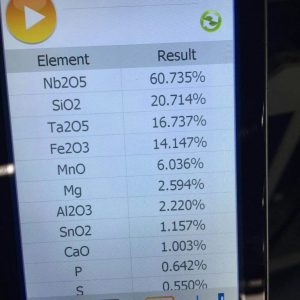
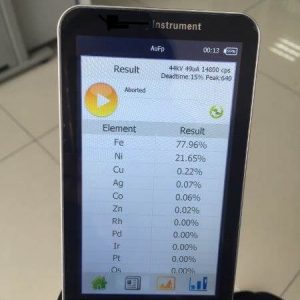
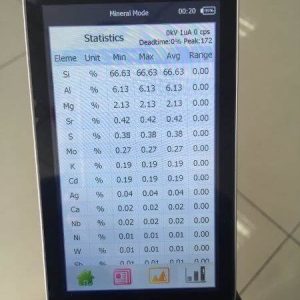
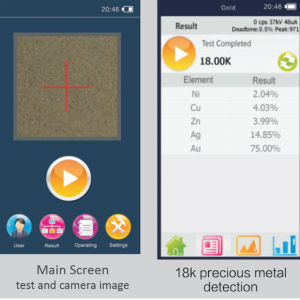
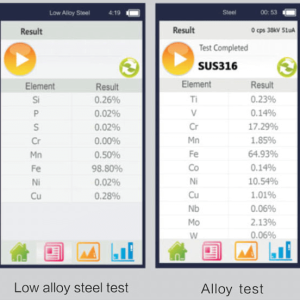
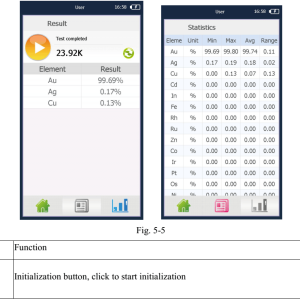
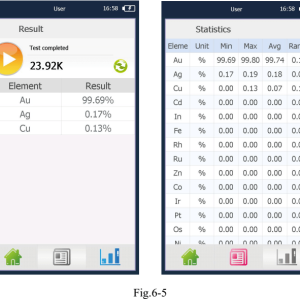
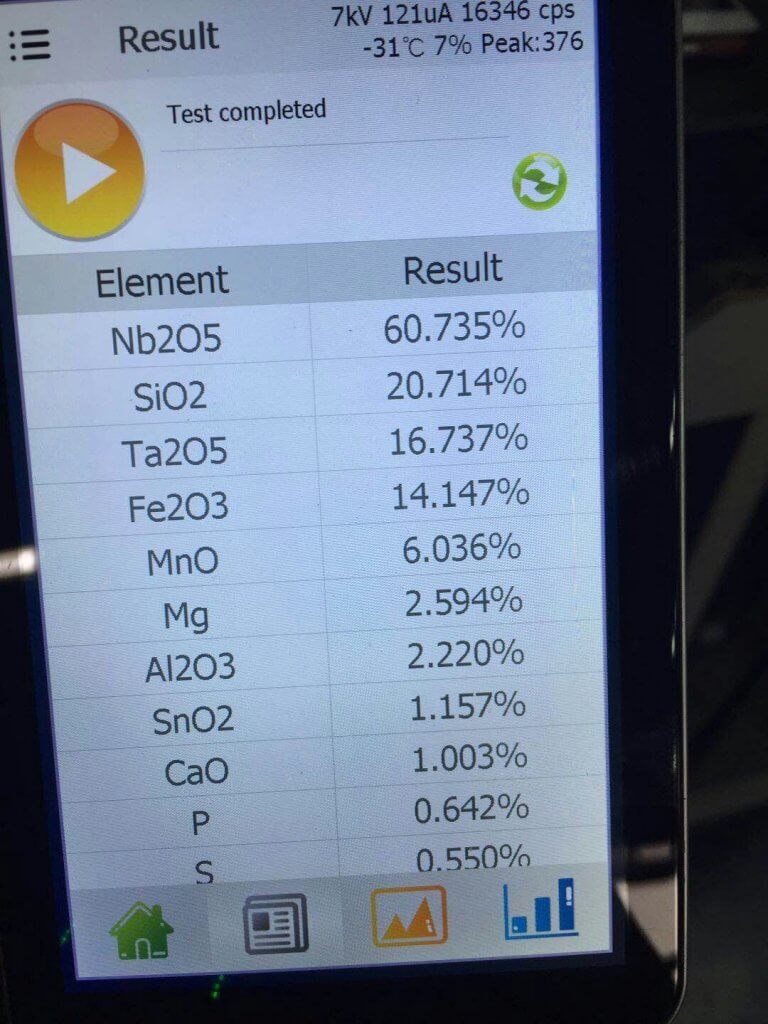
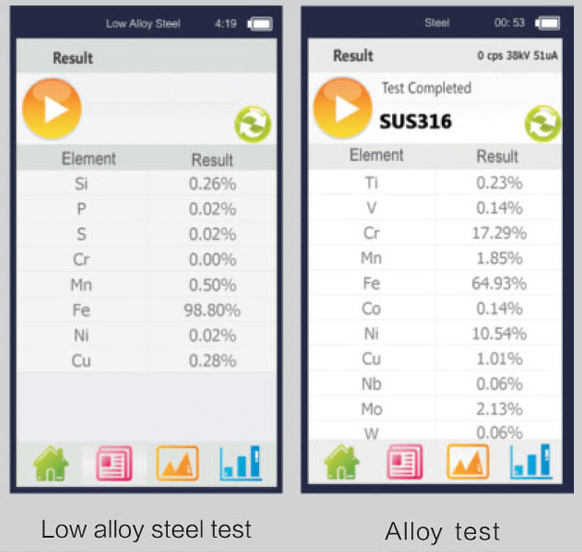
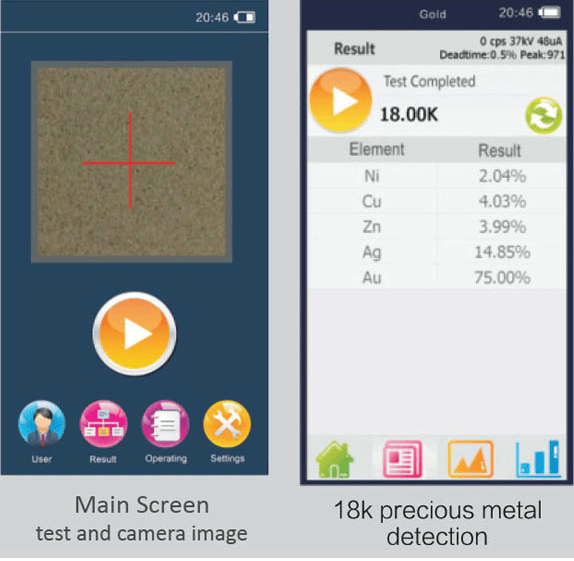
The Test results interface displays the test values, K value of the precious metal and alloy grades,etc. (Figure 5-5 left), and users can view the statistics of multiple measurements (Figure 5-5 right). Icon functions are listed in Table 5-2.
Operation
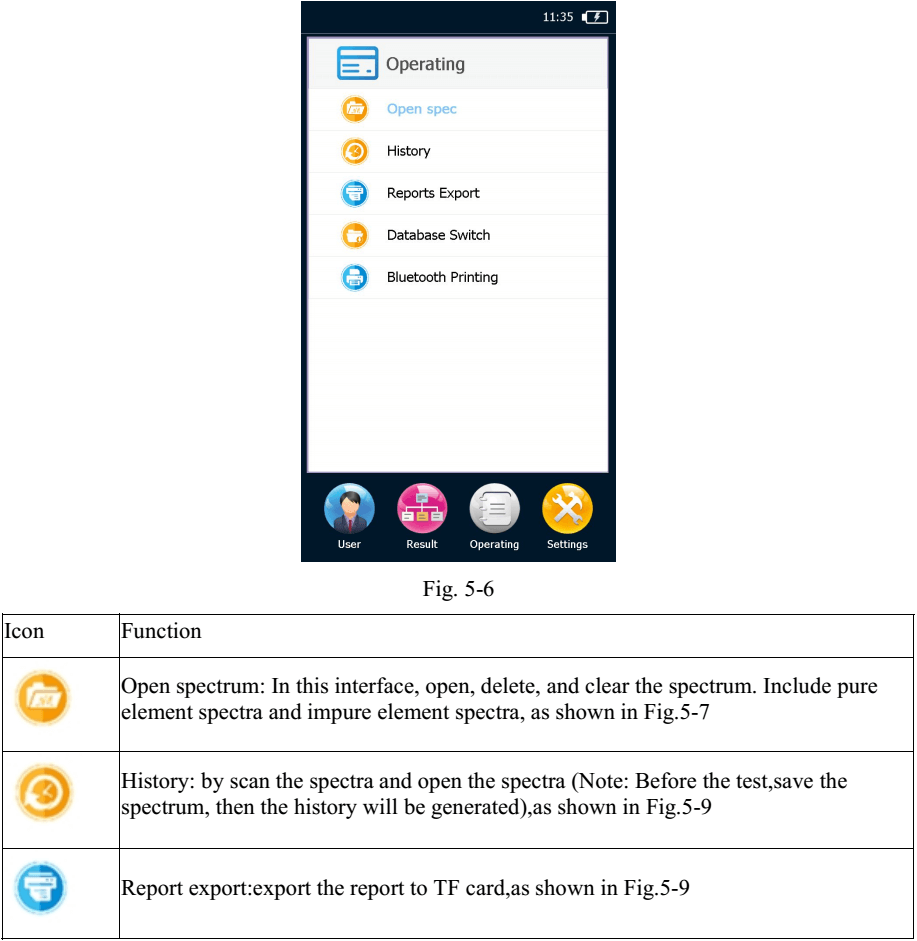
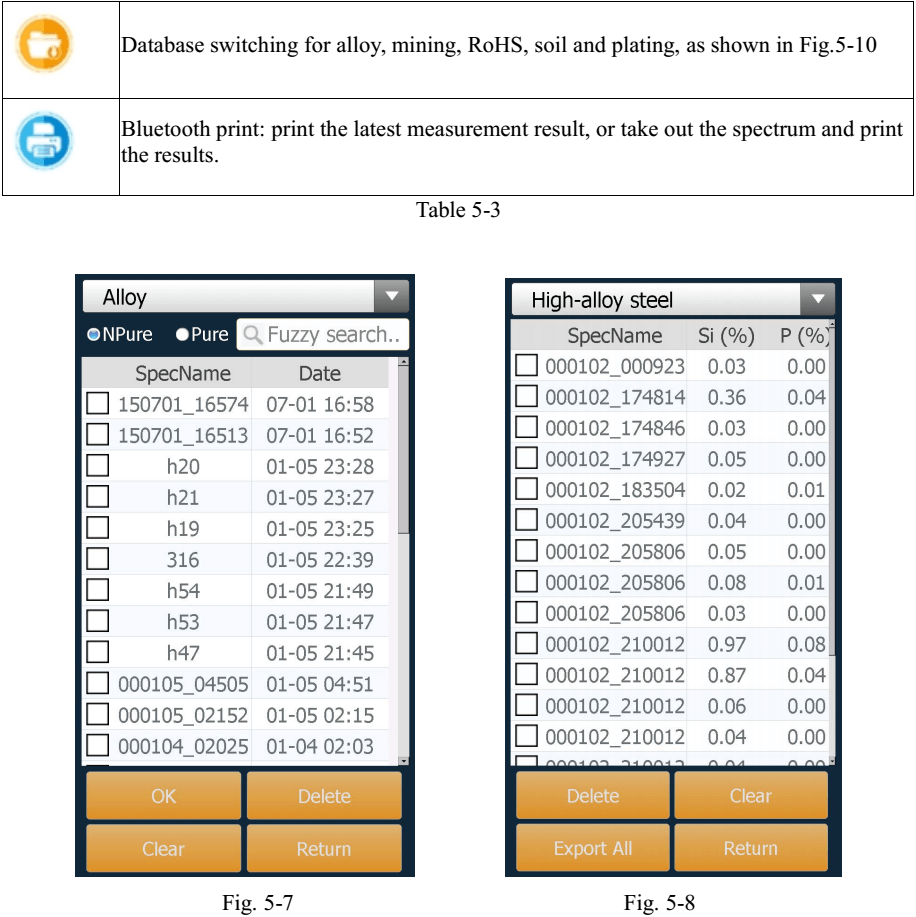
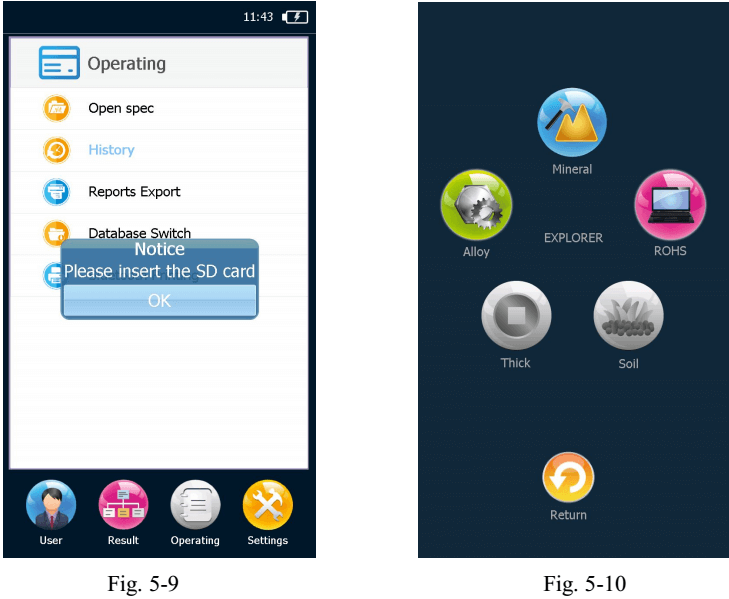
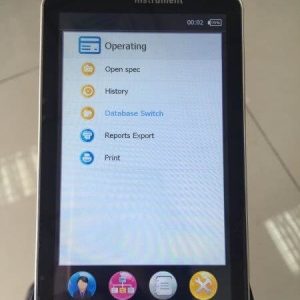
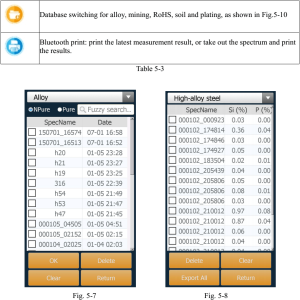
As shown in Figure 5-6, the module contains open spectrum, history, export report, database switching and Bluetooth printing functions, listed in Table 5-3.
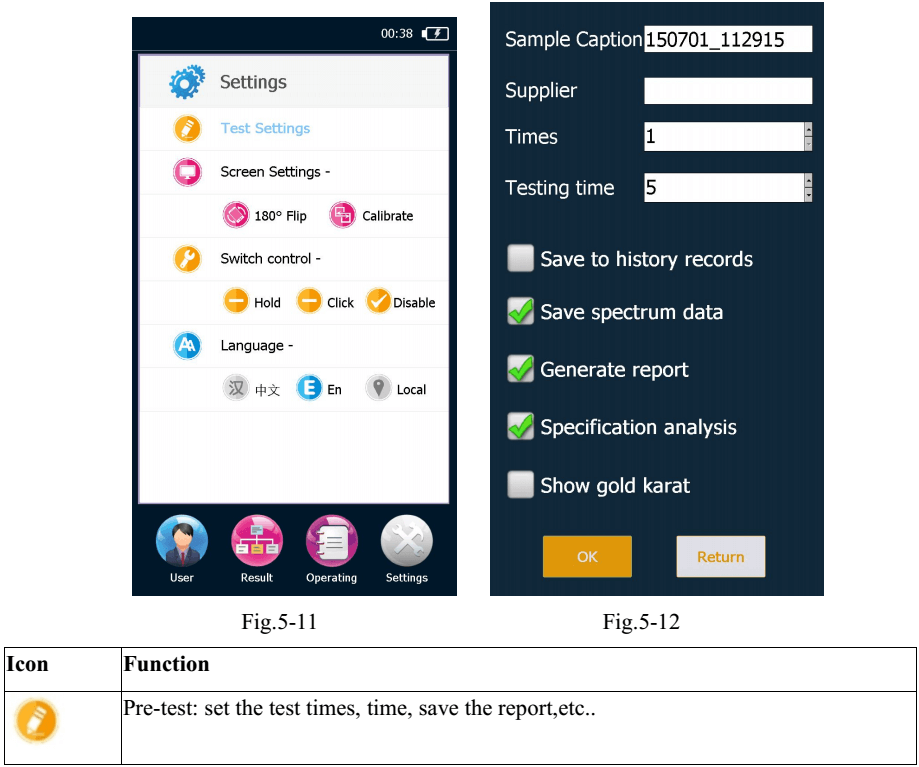
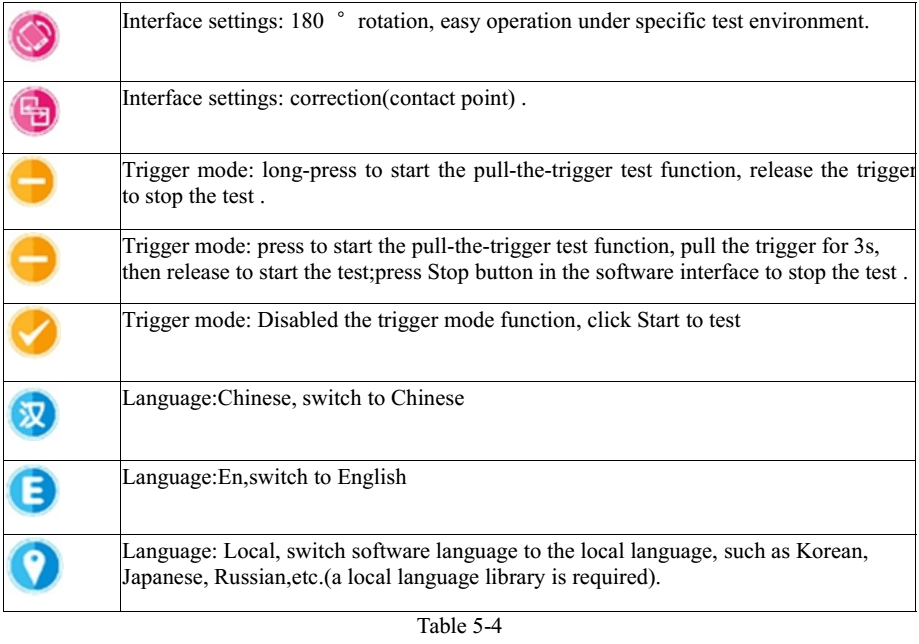
Setup
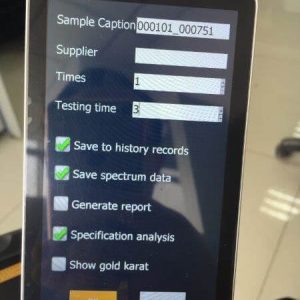
Start routine functional test in the Test interface (Figure 5-11) , such as sample name, test times, interface settings and language settings,etc. Detailed info is listed in Table 5-4
SAMPLE MEASUREMENT
Initialize
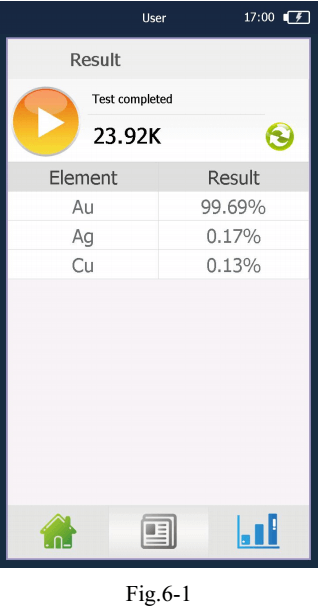
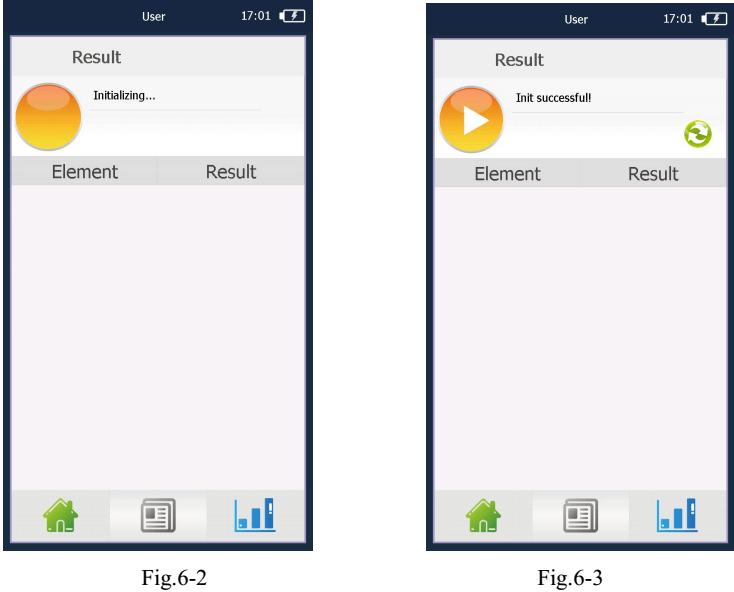
Generally, start the initialization for the first use of the instrument or the initialization conditions are changed. Enter Test Results (Fig.6-1)→ click ,the system initialization takes 3-10 seconds (Fig. 6-2), please be patient, pop-up Initialization succeed after the initialization(Fig. 6-3).
If initialization fails, prompt Initialization fails. Many reasons cause initialization failure. The most common approach is to check the tube voltage, tube current for initialization, which is modifiable for re-initialization till it succeeds.
Test
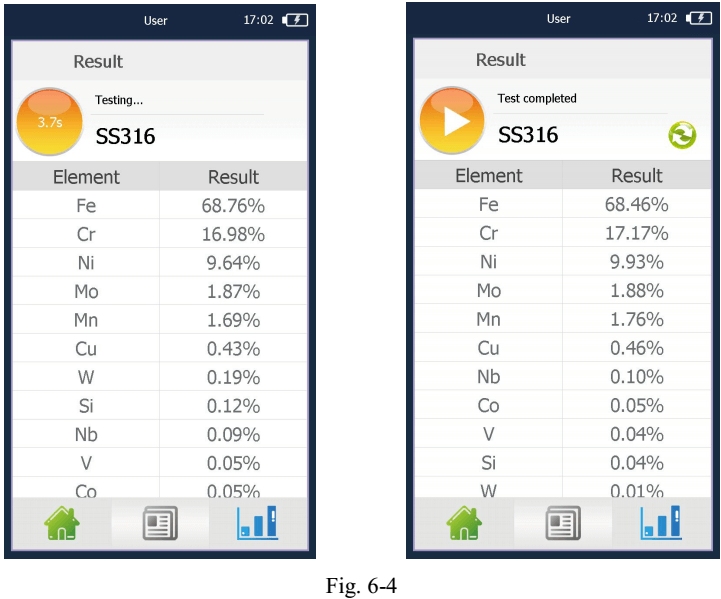
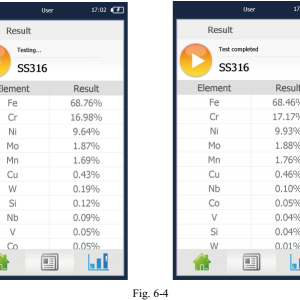
Enter the user mode after boot. Put the sample in the test window, click Fig.6-4 left is schematic of the measurement interface, the right is schematic of the measurement results. If start the test with no sample, the instrument will remind you Place the sample.
Note:
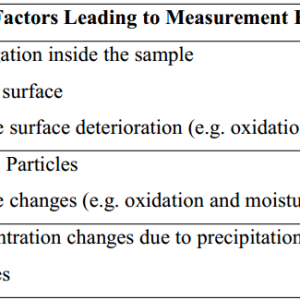
- Portable X-ray fluorescence analyzer is applied for surface detection and analysis, the surface coverings of the test objects may affect the detection accuracy;
- Portable X-ray fluorescence analyzer detection range covers about Φ5mm , any unevenness or incompleteness may affect the detection accuracy.
Result analysis
After the measurement, data interface appears, including test result, statistics, as shown in Figure 6-5, left is test results, right is statistics.
Print
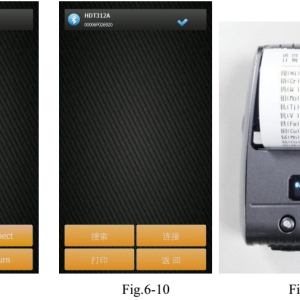
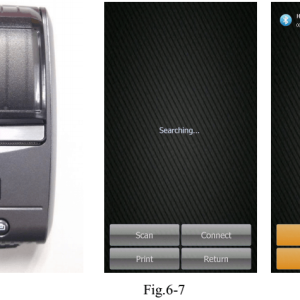
Bluetooth-print the latest measurement result, or take out the spectrum and print the results. First start the Bluetooth printer, as shown in Figure 6-6, push the switch button in the middle to start it.
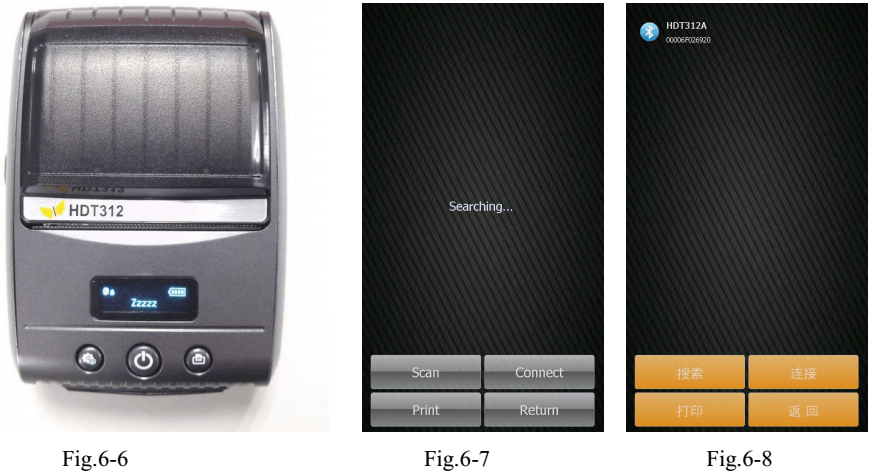
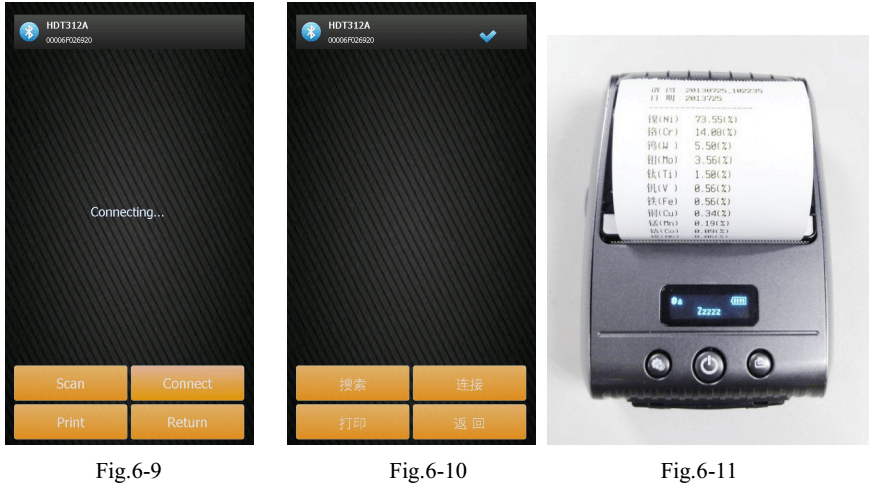
Enter Operation interface, select Bluetooth Print->Search as shown in Figure 6-7.
Search the Bluetooth printer, as shown in Figure 6-8 left. Select the printer name, click Connect as shown in Figure 6-9, connect succeed is as shown in Figure 6-10 . Select Print to print the corresponding report as shown in Figure 6-11.
CARE AND MAINTENANCE
Daily Maintenance
XRF analyzers are precision instruments which require close attention to the maintenance. Here are some suggestions to help you prolong the service life.
- The instrument should be operated and kept by the specialized personnel. Any other person cannot access, operate or move the instrument without permission.
- Do not attempt to make disassemble or modify this instrument. Unauthorized servicing may damage the instrument.
- During uses, storage and transport of the instrument, be especially careful to avoid knocking, and damages to the surface or internal wiring.
- During measurement, avoid interferences from electric motor, shocking, electric welding equipment, electromagnetic, high voltage and other sources.
- Keep the instrument away from dust, dirt or extreme temperatures which may cause poor performance or internal damage.
- Keep the instrument dry. Minerals in rain, humidity and liquid can corrode electronic circuits.
- Do not use harsh chemicals or strong detergents to clean the instrument. Wipe dust off the cover with soft cloth. Clean dirt gently with cotton balls dampened with alcohol.
- When the instrument will not be used for a period, cover it with dust cover and place it in a dry and well ventilated safe place.
- For long-term normal operation, the parameters need to be tested regularly and make adjustments.
Periodic Maintenance
Followings are items require periodic maintenance.

Storage
- The instrument should be placed in an environment free of accumulated dust, as the dust may pollute the optics system and thereby lead to inaccurate outcome even out of service.
- The instrument cannot be stored in a place of extremely high temperature. Otherwise, it will shorten the service life of electronic parts.
- The instrument cannot be stored in a place of extremely low temperature. Otherwise, when the surrounding temperature rises, humid gas will be produced inside the instrument which may damage the electronic boards.
Transportation
During transportation, please separate the instrument and the battery and have the instrument and all its accessories placed in the vacuum carrying case to protect them from water, pressure and shock.
SAFETY
- Do not attempt to make disassemble or modify this instrument. Unauthorized servicing may damage the instrument.
- Avoid splashing liquid or dropping foreign objects into the instrument. If a foreign object comes into contact with electrical parts inside the machine, it might cause a short circuit and result in a fire or electrical shock.
- Do not point the measurement window of the analyzer at any person.
- Be careful not let irregular barbed samples pierce the test film, which may cause further damage to the beryllium window.
- Secure the safety strap in case of falls.
- If there is smoke, or unusual noise, immediately turn the main power switch OFF, disconnect the power cord from the power outlet, and then call your local authorized dealer. Using the instrument in this state may cause a fire or electrical shock. Also, avoid placing objects around the power plug so as to disconnect the power in emergency.
- For safety reasons, turn off the power switch of the machine when it will not be used for a long period of time, such as overnight. As an added safety measure, turn off the main power switch, disconnect the power supply, cover it with dust cover and place in a dry and well ventilated safe place when the machine will not be used for an extended period of time, such as during consecutive holidays.
- Use the power cord other than the one that came with the instrument may cause damage or compromise your safety. Followings may cause a fire or electric shock.
- The power cord is not fully plugged into the power outlet.
- Power cord near a heat source may cause melting surface.
- Disassemble or modify the instrument.
- Damage or modify the power cord.
- Place heavy objects on the power cord.
- Have the power cord tied or knotted. Pull hard or excessively bend the power cord.
- Insert or pull out the plug with wet hands.
TROUBLESHOOTING
Failure is unavoidable for complicated spectrometers. Here are some tips for analysis and troubleshooting of some common anomalies.
Radiation indicator off or not flashing during measurement
Under normal circumstances, the radiation indicator keeps flashing the entire measurement process. The indicator off or not flashing maybe caused by the followings reasons:
The power supply is not turned on
Cause: If the power button is not turned on, the instrument will not start work, the radiation indicator light will not be illuminated or flashing.
Correction: Turn on the power supply before proceeding.
Abnormal X-ray protection system
To prevent X-ray leakage, the HV generator works only when the radiation protection system works normally. For radiation protection system works properly, check the following:
A) Set “Auto-sensing” state. Infrared sensor switch should be located at the nosepiece, if set to the “Auto-sensing” status, infrared sensor switch and radiation indicator will be linked, only when the sample is located within 15mm directly in front of the infrared sensor switch, the radiation indicator will work properly;
B) Put sample in the instrument nosepiece. Without a sample in place, the radiation indicators will not work normally. In this case, the indicator light will be off, or go off automatically after flashing for one second for low blank count rate.
Abnormal X-ray tube HV
Cause: Unspecified operations may lead to too high tube voltage and current. When it goes far enough, the discharge even damage may occur. After other possible causes have been ruled out, abnormal X-ray tube HV may be the reason.
Correction: Contact us to have the X-ray tube HV replaced.
Smoke or Unusual Noise
The smoke may be produced by damaged parts burned out by short circuits. Unusual noise may come from discharged HV supply, if it is not the buzzer alarm of low battery. Using the instrument in this state may cause a fire or electrical shock.
Correction: Immediately turn off the main power, plug out the battery from the instrument handle and disconnect the power cord from the power outlet. Then call your local authorized dealer or service center.
Others
If a failure occurs, we recommend that you consult the troubleshooting information included here. If after using the above troubleshooting techniques your instrument is still not performing properly, please do not open the instrument for internal inspection, which may damage the components inside or even compromise your safety.
Correction: Please record the abnormal phenomenon and then contact your local authorized dealer or service center.













 HANDHELD XRF ANALYZER ACCESSORIES
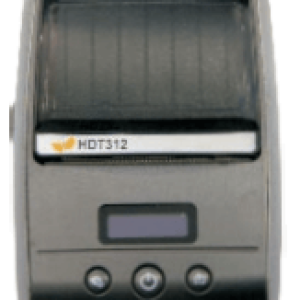
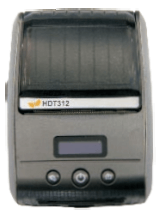 To achieve on-site printing data by portable Bluetooth printers.
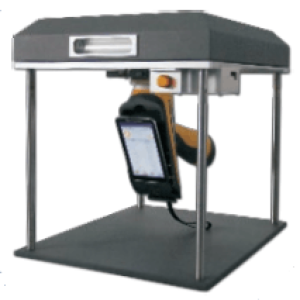
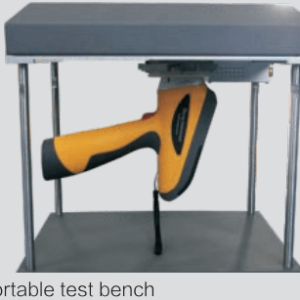
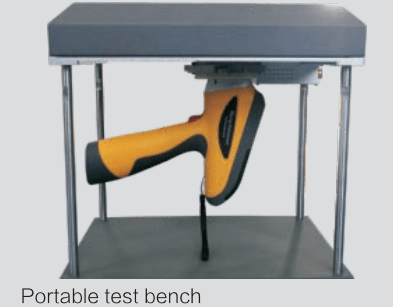
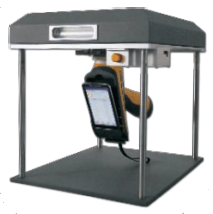 Optional portable support or seat type support provide more choices for customers.
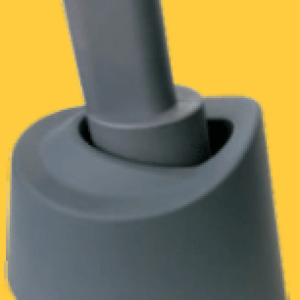
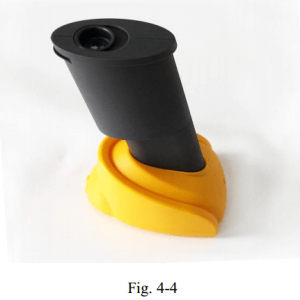
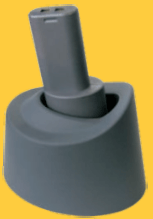 A horseshoe shaped battery: battery capacity at 27000 mAh, prolonging test time 3 times, and use as the seat stent.
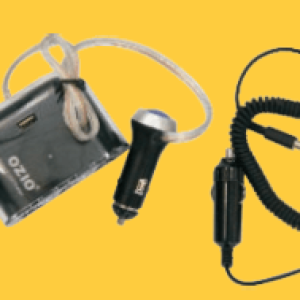
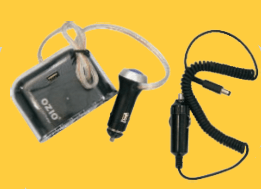 Four into one car charger can extent charging times in field.
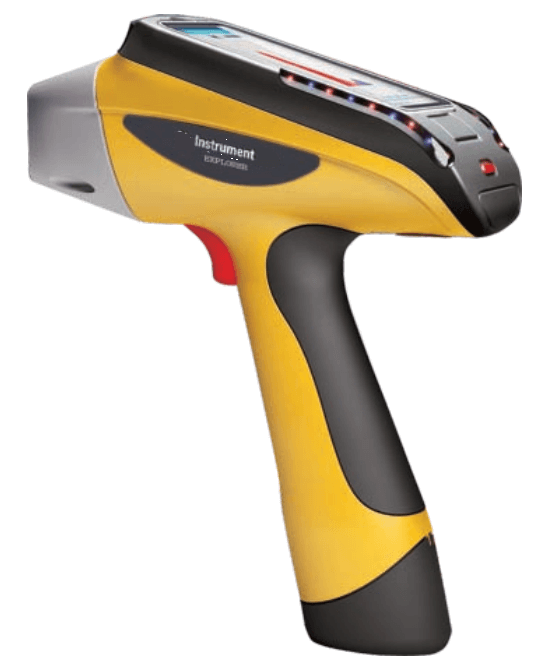


 Any discrepancies with the product packing list, please contact us.

 Radiation Indicator – when HV power is applied on the X-ray tube, the radiation indicator flashes red. Otherwise, constantly green.


 For security, be sure to use the supplied adapter and battery charger. Using a different power cord or battery charger could cause malfunctions or danger.
 NOTE: Gently press the power button. Do not force too much to avoid damaging the button.


