Table of Contents
In this recommended method of preparing a thin section the operator begins by obtaining a rock slice approximately 1 inch in diameter and 1/8 inch thick. The rock slice is ground on the coarse and fine grinding laps until a flat surface without visible pits is produced on one side.
An important step in the procedure is to frost the side of the glass slide on which the rock slice is to be mounted by grinding it on the fine grinding lap. The frosted glass slide and the flat rock slice are heated until the surfaces of each can be covered with a thin-coating of thermo-plastic cement, and the rock slice is mounted on the glass slide. This method of mounting insures superior bonding and virtually eliminates any failures due to parting of the rock slice from the glass slide.
After the rock slice is mounted on the glass slide, it is ground on the coarse and fine grinding laps until it is between 0.02 and 0.03 mm in thickness. The thin section is washed and dried, and a final examination is made with the microscope to determine whether the thin section is thin enough. Finally, the thin section is protected by cementing a cover glass on the rock slice with a drop of mounting balsam. The finished thin section is then labeled on either end of the frosted slide by writing with a pencil or India ink.
The improved cementing bond between a frosted glass slide and thermo-plastic cement has made it possible to prepare thin section smears of loose, crushed grains. Grain thin sections have been made of a variety of minerals, including quartz, labradorite, epidote, topaz, hornblende, tourmaline, zircon, and numerous ore-dressing -products.
Preparation of a Rock Slice for Mounting
The first step in preparing a thin section is to obtain a chip or slice of rock about 1 inch in diameter and 1/8 inch thick. This can best be accomplished with a diamond saw, because the area to be studied can be accurately and rapidly cut to the desired size and shape. Chipping with a hammer, although feasible, commonly gives irregular fragments and is not so selective as to exact areas.
The rock slice is ground on a revolving cast-iron lap using dry coarse silicon carbide (minus 150-mesh) fed on a wet lap until a flat surface without visible pits is produced on one side. After washing the rock slice clean, grinding is continued to produce a smooth surface on a fine grinding lap, using fine silicon carbide (minus- 500-mesh).
The fine silicon carbide is fed to the lap as a 10-percent suspension of silicon carbide in water from a small bottle similar to a salt shaker. This method of adding the grinding compound eliminates a dust hazard and permits control of the amount and distribution of the silicon carbide on the lap.
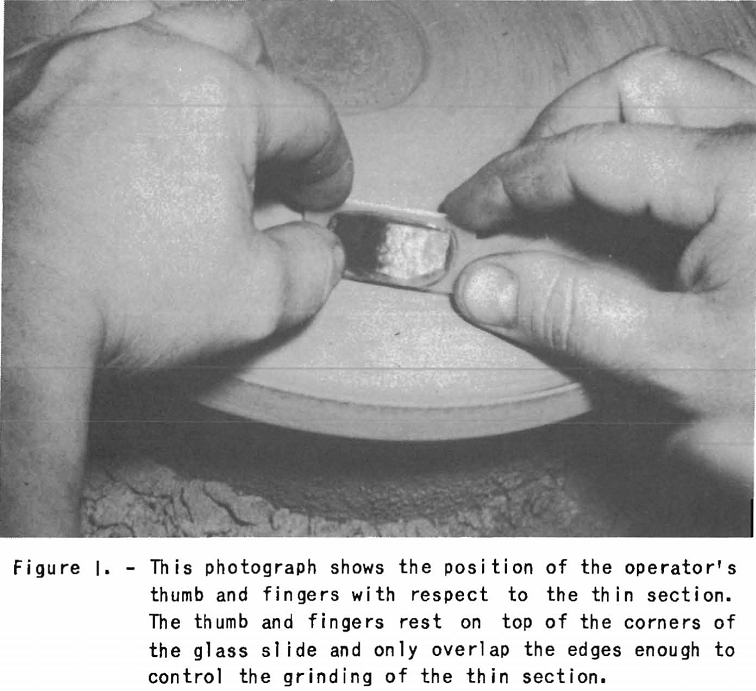
It is essential that the final surface be perfectly flat; this is accomplished best by holding the rock slice with thumb and forefinger of each hand, so that equal pressure is applied to each corner of the rock slice (fig. 1). Begin the grinding from near the center of the lap, moving toward the outside of the lap with a. continuous back-and-forth motion. The long edge of the rock slice should be held at an angle to the motion of the lap, so that the silicon carbide is caught against the edge of the rock slice. This gives a uniform grind on the rock slice and tends to utilize more of the silicon carbide before it is thrown from the lap by the motion. This method of grinding is used on both the coarse and fine grinding laps, and the amount of pressure and silicon carbide used depends on the type of rock being ground. After a flat surface is obtained on the fine grinding lap, the rock slice is washed clean of sludge and abrasive, and it can be dried quickly by either heating it or exposing it to a blast of compressed air.
Preparation of Friable and Altered Hocks for Mounting
Many altered and friable rocks will disintegrate during the cutting and grinding procedure, and such specimens have to be specially treated. An effective method for cementing such products is to allow the rock samples to soak for a day in a solution of 90 percent xylene and 10 percent cooked Canada balsam. After soaking, the specimen is dried in air or by application of gentle heat. If the rock slice is still too fragile to withstand grinding with coarse silicon carbide, it should be heated on a hot plate until it can be impregnated with small amounts of Canada balsam to fill all pores in the material. If the sample still cannot be ground, the latter operation is repeated until a satisfactory bond has been obtained. The rock slice is then ready for cutting, grinding, and mounting on a glass slide.
Preparation of the Glass Slide for Mounting
An important step in the procedure is to frost the side of the glass slide on which the rock slice is to be mounted by grinding it on the fine grinding lap in a similar manner to grinding the rock slice. The grinding is continued until the one side is completely frosted. The slide is then washed clean and placed on the heating plate ready for mounting.


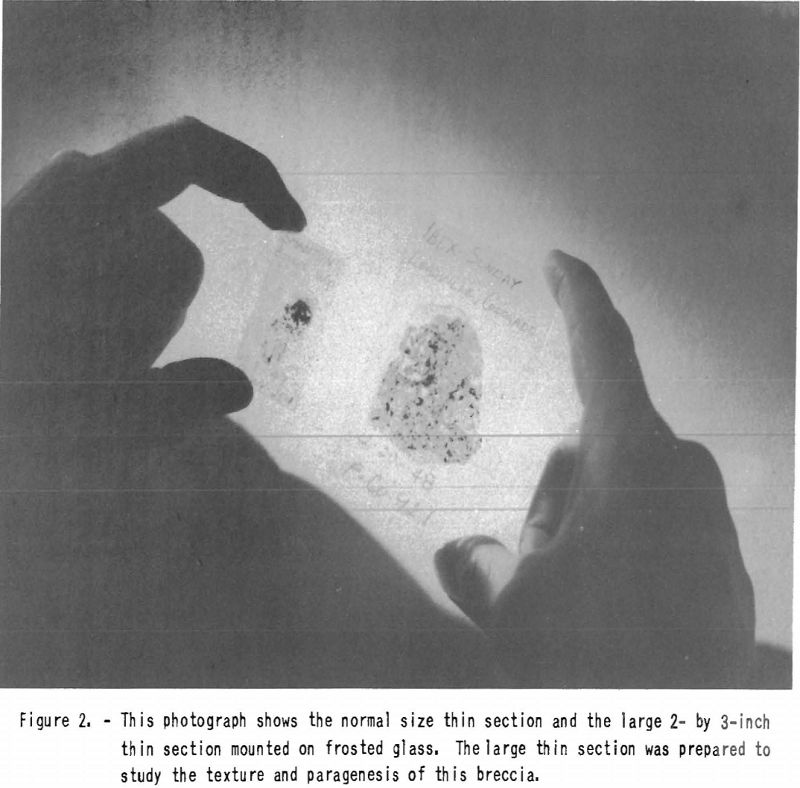
Frosting of the glass slide gives the following advantages: the glass slide and the rock slice have an irregular surface that gives the cement a much better chance to form a stronger “bond “between the two surfaces; grinding the surface removes any irregularities in the surface of the glass, and the frosted surface is assured of being free of oily films. With the stronger bond, failures are minimized, and both coarse and final grinding of the section can be hastened. Large 2- or 3~inch thin sections of rock as well as normal-size thin sections can be prepared on ordinary glass whose surface has been ground flat by this method (fig. 2). The cementing material, which has almost the same index of refraction as glass, makes the frosted areas clear when the rock slice is attached. As far as could be determined, no optical difference was found between thin sections mounted on frosted glass and on clear glass.
Mounting Rock Slice on Frosted-Glass Slide
The frosted glass and the flat rock slice should be heated until the surfaces of each can be covered with a thin coating of melted thermoplastic cement, if available, or Canada balsam. It is important in this operation not to overheat the rock slice or glass slide, because this will burn the cementing material; and if either is too hot during mounting, excessive bubbles will form between the rock slice and the glass slide. If the rock slice and glass slide are only slightly overheated at the beginning of tho mounting operation, it is best to let them cool until bubbling from tho rock slice stops. If the thermoplastic cement is too cool, its fluidity is not great enough to obtain a satisfactory contact between the glass slide and rock slice. When this condition prevails, the glass slide and rock slice are not parallel with each other; and when grinding to tho final thinness, part of the rock slice will be ground away. With a small amount of experience, it becomes easy to judge the correct heating of the cementing material. The next stop is to remove the rock slice from the hot plate to the table top and to place the frosted side of the glass slide on the flat and smooth surface of the rock slice. A slight pressure exerted by means of the butt end of a pencil on the glass slide will force all air bubbles from the contact between the glass slide and the rock slice. The mounted thin section should be allowed to cool to room temperature.
Grinding Mounted Rock Slice
The next stop in .preparation of the thin section is to grind the mounted rock slice to the required thinness. The first stage of grinding is done on a lap with coarse silicon carbide and is continued until the rock slice is approximately ½ mm. thick, or until the minerals become transparent. It is essential that the final surface made in this operation be flat and parallel to the glass slide. This is best accomplished by starting the grinding from near the center of the lap and moving toward the outside of the lap with a back-and-forth motion and at the same time applying equal pressure on each corner of the glass slide. While the rock slice is comparatively thick considerable silicon carbide can be used, but toward the end of the coarse grind it is best to keep to a minimum the new abrasive added to the lap.
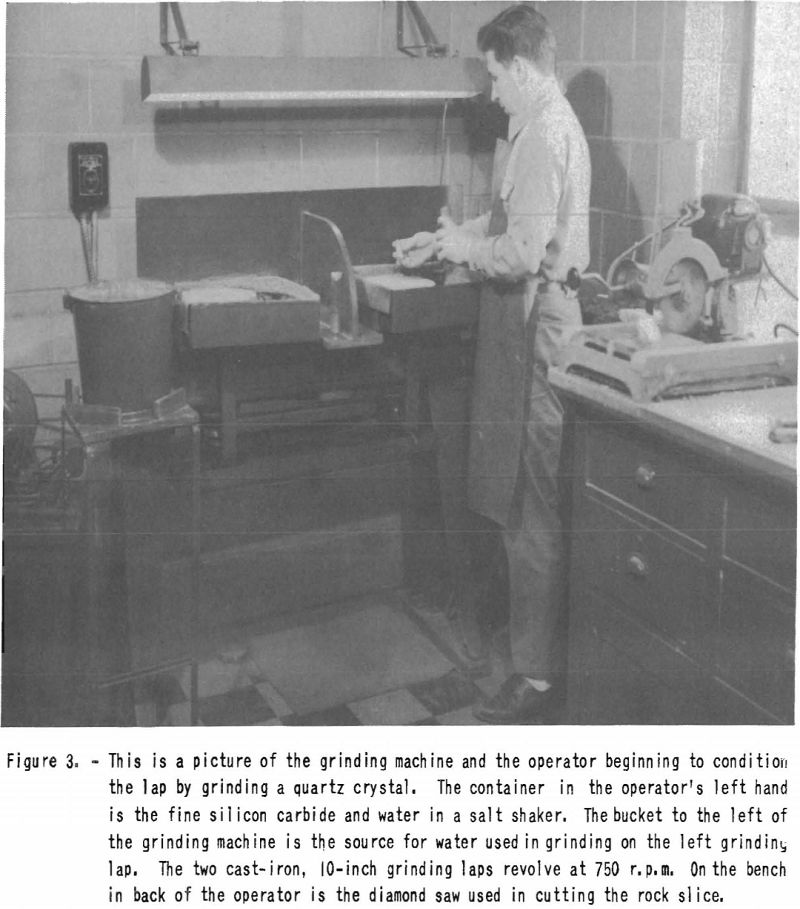
When the section is thin enough for the fine lap, it is washed free of the silicon carbide and sludge. Most of the grinding on the fine lap is done near the center of the lap, where the abrasive action is less. Grinding is continued on this lap until the line between the glass slide and the cementing material is almost obliterated; when the correctly mounted section is this thin, it is between 0.02 and 0.03 mm- in thickness. The line referred to is the smooth outer rim of the cementing material that has not been ground by the abrasive. If the lap begins to tear the thin section during the final grinding operation, the lap should be smoothed by grinding a small quartz crystal for a few minutes (fig. 3). This operation will remove any coarse grit from the lap and smooth out any rough spots in the lap. If the thin section continues to pull out or break away, it will be necessary to recement the areas that are pulling away with mounting balsam, which is one part xylene to two parts Canada balsam.
The most important caution to be observed in the final grinding is the adding of fresh silicon carbide. If the minerals are soft and the section is almost thin enough, the addition of new silicon carbide will quickly grind away all or part of the thin section. This can be prevented by grinding with a quartz crystal for a few seconds after adding fresh silicon carbide and before continuing grinding of the section. Most operators will gain valuable experience by completely grinding a rock slice from the glass slide, using as light a pressure as possible. By doing this, the operator will acquire the feel of just how far he can grind without losing the rock slice. After the section has been compared with a microscope to insure that it has boon ground to tho necessary thinness, it is washed and dried.
Mounting the Cover Glass
The thin section is then ready for mounting of the cover glass. One drop of mounting balsam from the end of a glass stirring rod is placed on the center of the rock slice, and a cover glass is gently pressed into place with the rubber end of a pencil. If any bubbles are formed between the rock slice and the cover glass, they can be removed usually by pressing the rubber end of a pencil on the cover glass near the bubbles and working the bubbles outward. If the bubbles cannot be eliminated by this method, remove the cover glass by sliding it away from the glass slide. Then repeat the procedure with a smaller amount of mounting balsam. If the balsam solution is too thin, bubbles will be formed more readily; if the balsam is thick, the cover glass does not mount close enough to the rock slice.
The finished thin section is then labeled on either end of the frosted side of the slide by writing with a pencil or India ink.

Thin-Section Smears of Loose Crushed Grains
The improved cementing bond obtained between a frosted glass slide and thermoplastic cement has made it possible to prepare thin sections of loose mineral grains. Thin-section smears have been made of grains ranging in size from minus 10- to plus 560-mesh (theoretical) and have included a great variety of minerals such as quartz, labradorite, epidote, topaz, hornblende, tourmaline, and zircon. This type of thin section can be prepared in half the time required to make the conventional rock thin section.
The procedure for preparing these sections is as follows: First, frost the glass slide as described under “Preparation of the Glass Slide for Mounting.” and place it on the hot plate. Second, when the glass slide is hot, melt enough thermoplastic cement to cover an area the size of a cover glass. Third, with a spatula sprinkle the mineral grains evenly over the melted cementing material. Fourth, place a few more small fragments of thermoplastic cement on the top of the mineral grains; then, lot it heat until most of the mineral grains have settled and made contact with the glass slide. Remove the glass slide from the hot plate and cool to room temperature.
The grain section is ground on the fine grinding lap, and a cover glass is applied as has been described for a conventional rock-slice thin section.
If the grains to be examined are so rounded that they do not present a flat surface to the glass slide, additional grinding and remounting may be necessary. In such event, the grains are mounted as before and are ground only enough to form a flat surface on tho mineral grains. The slide is washed and reheated on the hot plate. When the thermoplastic cement has softened, the slide is inverted on top of a second frosted slide on which a thin layer of thermoplastic cement has been melted. The top original glass slide is slipped off, leaving the grains flat side down on the new slide and ready for finish grinding.
Several advantages are gained by making thin sections of grains: a petrographer is able to compare the birefringence and other optic properties of any mineral with quartz or other minerals by including such grains in the slide; it assists in obtaining interference figures of unknown minerals; it extends the use of thin sections to ore-dressing products.
