Table of Contents
PRO-CAMEL 24 Automatic Panning Machine
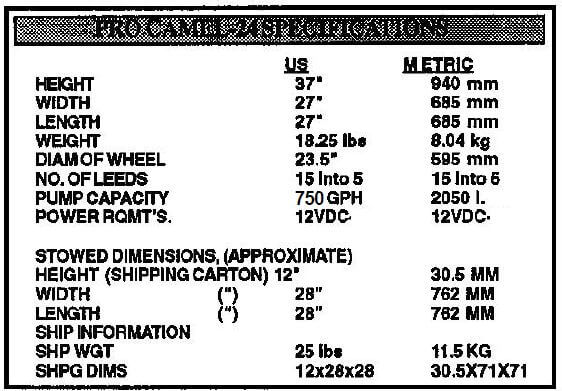
The Pro-Camel 24 is the largest 12 volt panning machine manufactured anywhere. It is a fast, high capacity machine capable of processing up to 400 pounds of placer sand per hour! This machine is for the miner who wants to process a lot of concentrates in a short time.
The Pro-Camel 24 features 15 spiral leads into a 5 lead second stage on a big 24″ wheel, Camel exclusive Aqua-Jet on the spray-bar churns and mixes the materials in the wheel for the fastest recovery possible and variable speed control.
DESERT FOX Variable Speed Automatic Panning Machine
The Desert Fox is a compact, light-weight gold panning machine you can take anywhere. Weighing under 10 pounds even with a rugged folding stand, it folds up and stores neatly in its Action Packer tub. Operate it right out of the tub, or remove it from the case and use it in a stream.. It sets up quickly and easily and can run 70 pounds of concentrates in an hour. It’s both a separator and a concentrator in one self-contained panning machine. Recovers an amazing amount of flour gold so you seldom lose even the smallest pieces.
Operates on any 12-volt 7-amp DC power source. Use an automotive battery or even a 35 watt solar panel. Ships complete with an easy-to-understand owner’s manual and a video, but this machine is so easy to operate you won’t need them to become a pro! A bag of practice sand containing real placer gold is also shipped with every Desert Fox so you can get acquainted with your new machine and see how efficient and easy it is to use. The Desert Fox is also available with Variable Speed Control. This is the only spiral gold panning machine on the market with this feature! Desert Fox has a Five Year Limited WARRANTY direct from the manufacturer, the Desert Fox Automatic Spiral Gold Panning Machine has been manufactured by Camel Mining Products since 1969.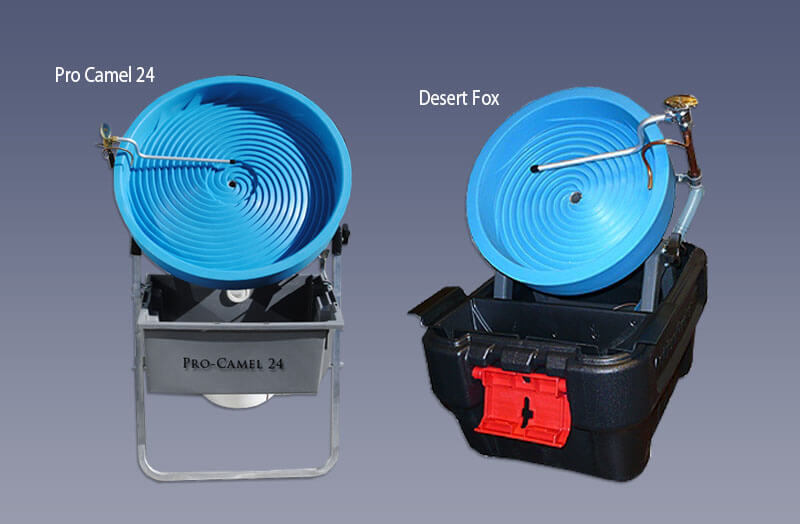
SPECIFICATIONS (PRO-CAMEL 24)
- Weight: 20 lbs.
- Wheel Diameter: 24″
- Capacity: 400 lbs. per hour
- Power Req: 12VDC 7AH
SPECIFICATIONS (DESERT FOX)
- Height: 20″
- Width: 14.5″
- Length: 20″
- Weight: 10 lbs.
- Wheel Diameter: 12.5″
- Water Req: 3-4 gal.
- Capacity: 500 gph
- Power Req: 12VDC 7AH
- Stowed Dimensions: Height 10″, Width 14.5″, Length 17.5″
Setting up your Pro Camel-24
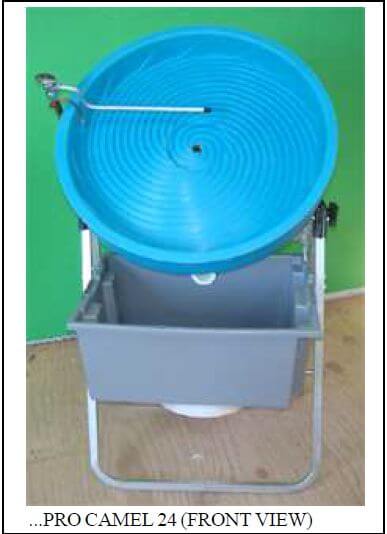
Begin by unpacking your Pro Camel – 24 from the shipping box. You will find the following components in the box:
1 wheel assembly
1 spraybar and hose assembly
1 motor drive unit assembly
1 pumps with clip leads
1 catch cup
1 folding stand
1 Tailings Tray
Setting up stand and drive unit
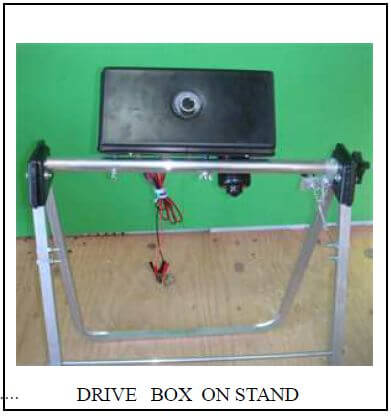
Open the folding stand. Notice that it has a crossbar with two holes in it and on one of the knees it has an adjuster mechanism. Place the stand so that the adjuster mechanism in on the right.
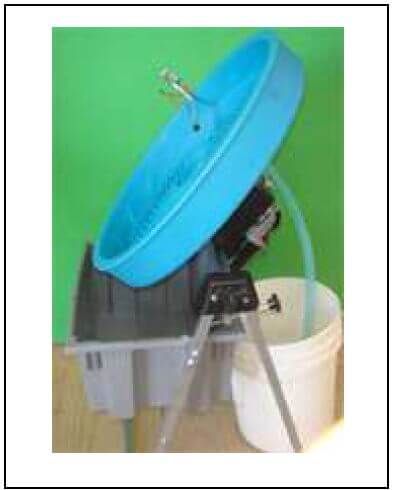
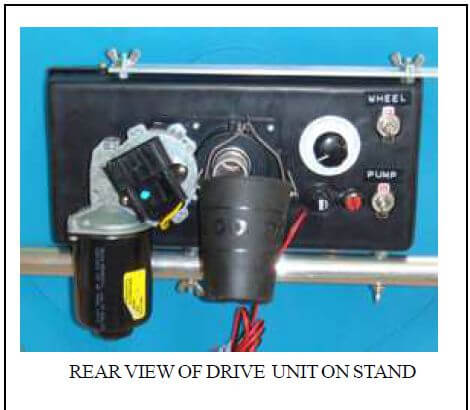
Place the drive unit on the stand with the mounting pins in the holes on the crossbar as shown in the photo (above right). the front side of the drive unit should be facing forward and tilted back at about a 45 degree angle. You can change the angle by turning the adjuster knob.
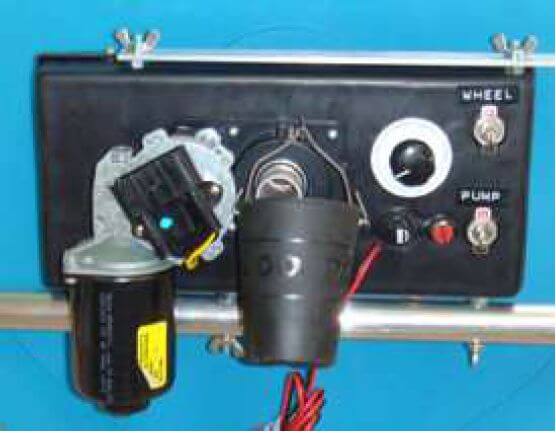
The drive unit has an 12-volt D.C. gearmotor on the back side of it near the motor in the middle is an aluminum tube, this is where the gold comes out!. Above the tube is a small brass hook , this is where you hang the catch cup. If you look at the area to the left side of the motor you will see a fuseholder and two screw head terminals. Do not attempt to loosen or tighten these terminals. These for you to clip the pump lead clips onto and are connected electrically inside of the drive unit. The fuse is a type 6 AGC fast blow 6 AMPERE fuse which you can replace at most automotive parts stores or Radio Shack Stores. NEVER use a fuse of a higher amp rating. You will void your warranty if you do.
Mounting the wheel
The wheel fits into the hole on the front side of the drive unit. You will notice that there is a small notch in the tube on the drive unit and a pin mounted on the tube on the back side of the wheel. The pin fits into the notch.
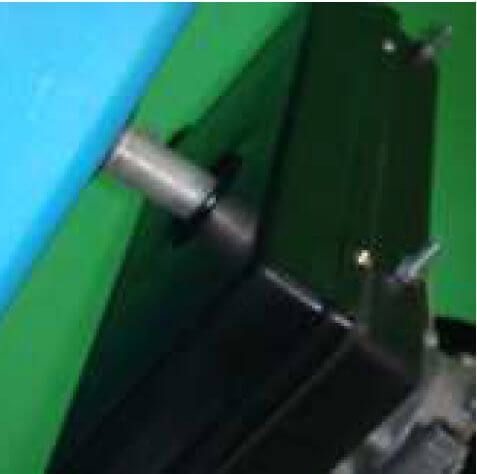
Adjust the wheel to approximately 45 degrees as this is a pretty good starting angle for most materials.
Preparing spraybar and pump
The spraybar is the next item to install but first you must prepare the pump. The ladie’s nylon stocking you found packed with your machine is used as a filter to screen small sticks, leaves and other debris which might jam the pump or clog the spraybar.
The stocking is placed over the pump after the pump is connected to the hose. The stocking is the pulled completely over the pump and tied so that it forms a tight bag around the pump. The pump is submersible and should never be operated out of water. If you allow the pump to run out of water it will damage the shaft seal and if allowed to run long enough the motor will overheat. The pump should always be completely submerged in water when it is in use.
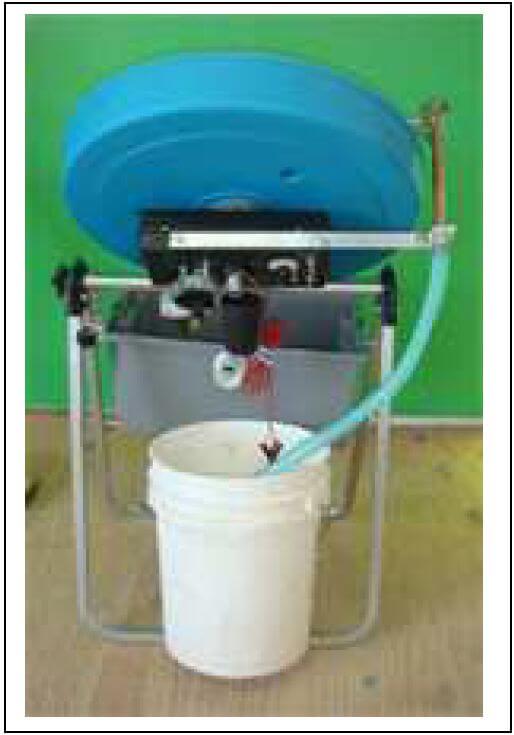
The spraybar mounts on the back of the drive unit on the two studs with wingnuts. Note that you should use care when hooking the spraybar and aqua-jet in the wheel.
Route the pump hose so that it does not interfere with the drive unit or adjuster mechanism.
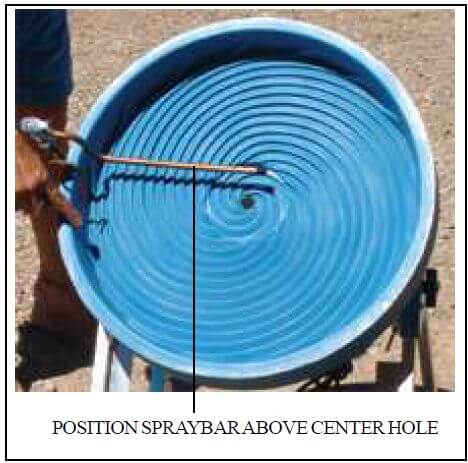
Looking at the wheel from the front you should have positioned the spraybar about one inch above the hole in the wheel. The aqua-jet ( smaller tube) is positioned about where it is shown and may need to be adjusted from time to time.
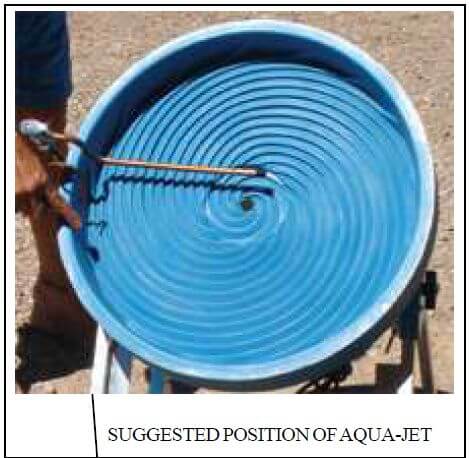
The aqua-jet is positioned simply by bending it to get the stream of water aimed into the clump of side the wheel. NEVER POINT THE STREAM DIRECTLY INTO THE SPIRAL RIFFLES!
The idea of the aqua-jet is to break up a clump of floating material, that is a body of material which is not in suspension the the water but staying together as a clump. The stream from the aque-jet should be final adjusted when the machine is put into operation.
Attach the pump clips to the terminals near the motor. The red clip goes on the red terminal. Hang the catch cup on the hook.
The setup of the machine is complete. In the next section we will discuss operation of the machine.

Introduction to the Pro Camel- 24 operation
The Pro Camel – 24 uses water, motion and gravity to separate placer material by specific gravity. Because there is a substantial weight difference between plain silica sand black sand and precious metal, this amazing machine can be adjusted to deliver what you want from your ore.
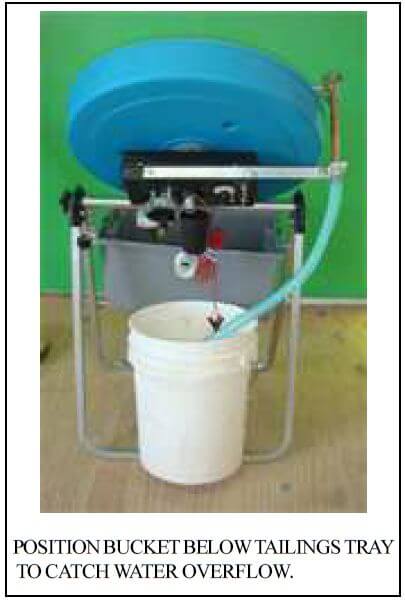
The machine is supported by the stand. The stand is designed so that it can be set up over your bucket (see photo ). We do not include the bucket with the machine and suggest that you buy one from your local hardware store.
The wheel is the part where the work actually takes place.
The first stage has fifteen riffles or spirals which run from the outer wall into the center in a counter-clockwise direction. When this wheel is rotated clockwise the spirals form a series of lifting ridges which move upwards towards the second stage inset five riffle cleaner which works exactly like the first stage, finally bringing the gold to the hole in the middle of the wheel. The ore being processed on the wheel literally slides along the bottom of the vees formed by the spirals and travels upwards into the hole in the wheel. A catch-cup hangs on the back of the drive box to gather the gold.
The pump and spraybar supplies the water needed to make the machine work. As material is moving up the face of the wheel, water is applied above and the natural erosion of sand by water carries up any material which the water can lift. The water strips off lighter elements of the ore first and the black sands and gold travel upwards.
By careful adjustment of the pitch angle of the wheel, water spray and speed of wheel rotation you will be able to tune your machine to deliver only clean gold to the center of the wheel. This gold will pass through the hole to a catch cup on the back of the drive unit. Loosen knob on right side of stand before adjusting pitch of the wheel and then tighten it again before continuing.
Beginning Operation
Components needed for operation are the machine, a catch tub to recycle the water, about 6 gallons of water, a wetting agent, a battery and some ore to process. We normally use an automobile battery for operation buy any battery or D.C. power source capable of 13.6 volts at 25 amps is adequate for continuous operation.
The wetting agent is any surfactant type wetting agent.
Cascade Crystal Clear or Jet Dry products are okay. You find these at your grocery store. John Deere Tractor Co. markets a wetting agents for fertilizer which is more economical if you use a large amount of it. It only takes 3 drops per gallon of water.
Pump Care and Maintenance
Introduction
 Camel Mining Products selected the Mayfair line of marine bilge pumps and they perform well in our panning machines. However, there are occasionally problems, usually from leaves, small rocks or sticks that get sucked into the pump and clog or jam the turbine chamber. Nearly always, problems of this sort will result in a blown fuse and must be cleared before the fuse is replaced and the pump put back into service. The five simple steps detailed here will keep your pump in operating condition for many seasons. The pumps which are supplied with Camel products are manufactured by Mayfair and are warranted by them, NOT by Camel Mining Products, any pump warranty claims should be made directly to Mayfair, a Mayfair warranty registration form was included with the instructions to this machine.
Follow the steps below, each step is keyed to a photo on the left side of this page.
Step No. 1 photo No. 1
Grasp the pump firmly with one hand and the black base of the pump firmly with the other. Twist the base of the pump clockwise until it clicks open.
Step No. 2 photo No. 2
Remove the base cover from the pump. Remove any foreign materials which may be lodged in this part of the pump. The base of the pump is a strainer or screen that is designed to keep debris fro entering the turbine cavity of the pump.
Step No. 3 photo No. 3
The turbine housing of the pump is a black part on the bottom of the pump under the base cover. It must be gently lifted and turned to be removed as it is keyed into the yellow pump housing like the base screen was but it is also pushed into a blind recess which will prevent it from turning. It must be lifted and then turned to unlock it from the pump housing.
Step No. 4 photo No. 4
Clean any debris or foreign materials which may be blocking the pump impeller. The impeller has three small blades, take care not to damage them. The impeller should turn freely. If it does not turn freely then there is a possibility that your pump is damaged and must be returned to the factory.
Step No. 5 photo No. 5
Reassemble the pump in the reverse order of the above steps. Install a clean nylon stocking over the pump to keep trash and debris from entering the pump through the screen
Other Information about the Pro-Camel 24
Warranty Information
The Pro-Camel 24 is warranted for a period of one year from date of purchase. To obtain warranty repairs you must pay round trip shipping charges to our repair facilities.
For warranty service call our customer service number 1-928-927-4009
PLEASE NOTE: WE HAVE SHOWN A PLASTIC BUCKET IN THE INSTRUCTIONS. THIS IS NOT INCLUDED. USE ANY TYPE OF TRAY OR BUCKET THAT WILL FIT UNDER THE TAILING TRAY.
